
 Pin
Pin
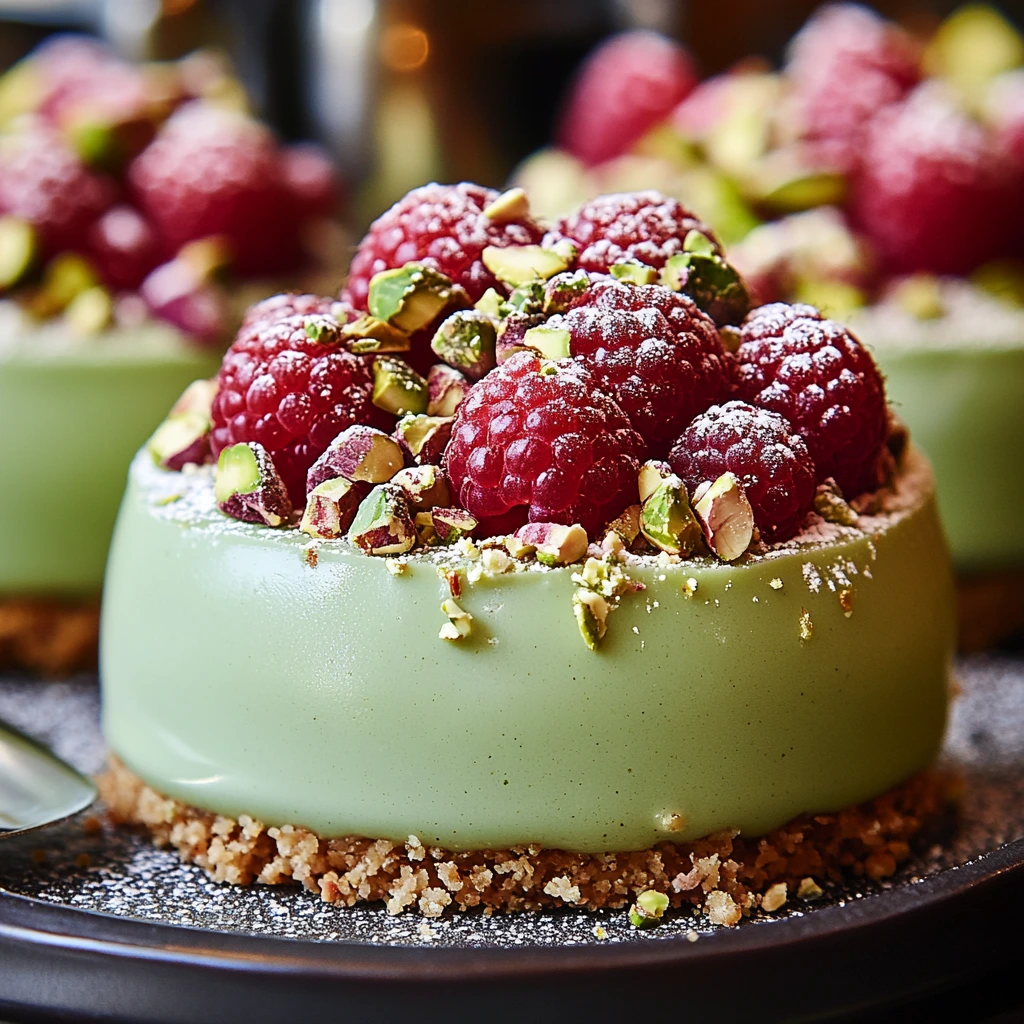
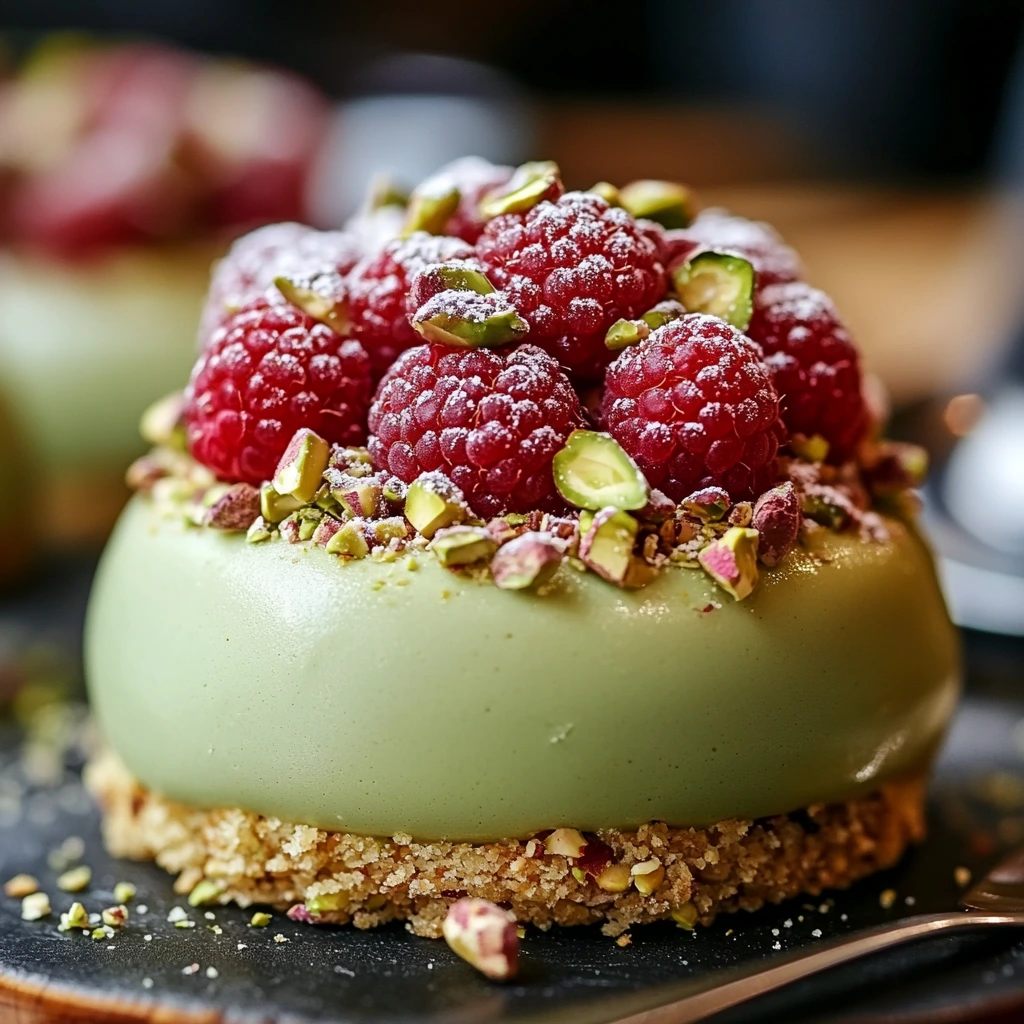
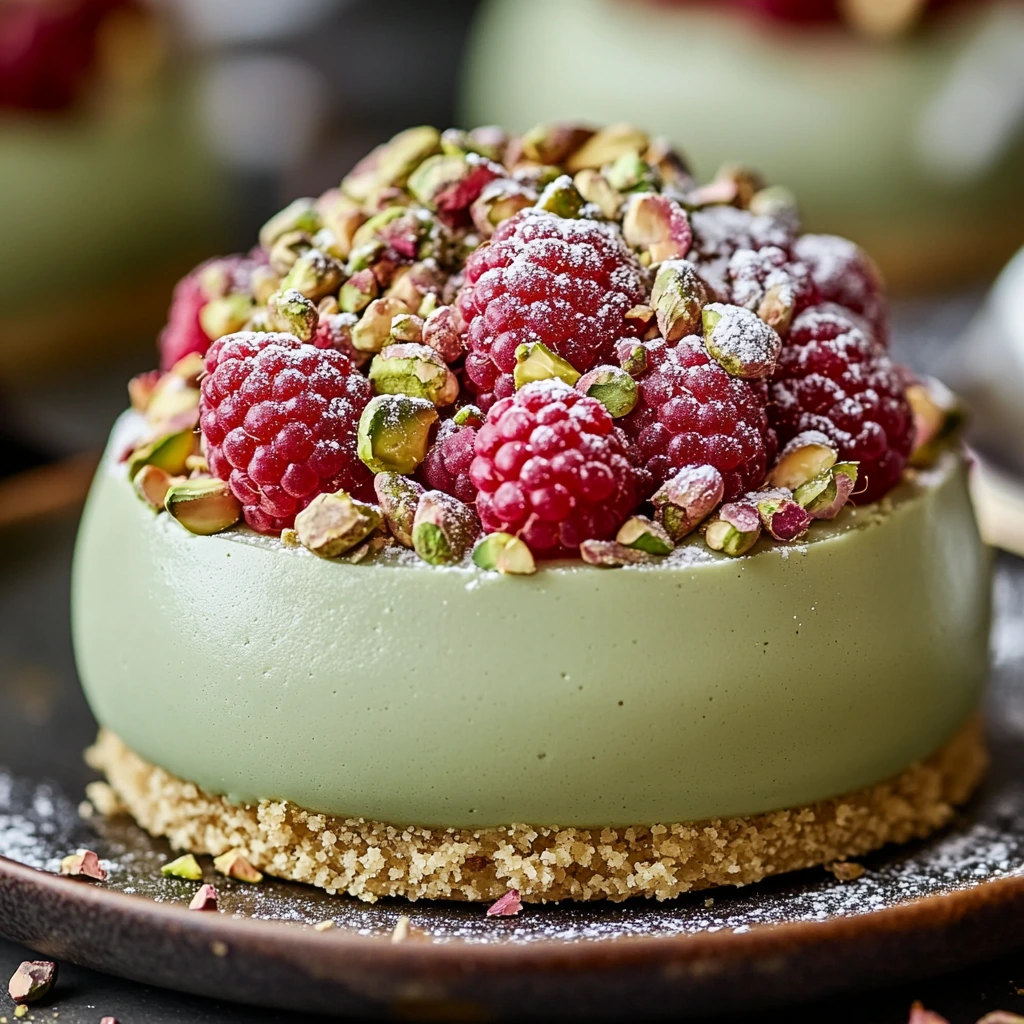
Standing at my counter with the rich smell of crushed pistachios and tart raspberries filling the air, I can't help but smile about how these little dome treats have become my go-to showstopper. What began as me trying to copy a fancy bakery treat turned into something even tastier - a perfectly balanced treat that looks store-bought but comes straight from your own oven. Each little dome shows off creamy pistachio cheesecake layers with a bright pop of raspberry in the middle, all resting on a crunchy graham cracker bottom.
When I made these for my sister's party before her wedding last month, everyone went quiet as they cut into their desserts and saw that bright red center. Even my picky nephew who always says he hates cheesecake wanted another one.
Key Ingredients
- Whole Pistachios: Don't bother with pre-ground options. Grinding them yourself makes the flavor pop
- Full-fat Cream Cheese: Make sure it's not cold from the fridge for the best mix. I messed this up my first time!
- Whipping Cream: Go for the richest one you can find for that silky texture
- Juicy Raspberries: Their tang balances out the rich cheesecake perfectly
- Crisp Graham Crackers: The newer the package, the crunchier your base will be
- Plain Gelatin: This is how you get those pretty shapes that won't flop over
Dome-Making Steps
- Start with the Bottom:
- Smash crackers until fine but still a bit chunky - quick pulses work best. Mix with melted butter till it clumps like damp sand. Push down firmly into your molds using a spoon back. Cool in the fridge while making filling - this helps them pop out easily later.
- Mix the Creamy Stuff:
- Grind your pistachios just until oily but not pasty. Whip cream cheese until perfectly smooth - bumps now mean ugly domes later. Sprinkle sugar in slowly - this keeps it from feeling grainy. Gently stir in ground nuts to keep their crunch. Beat cream to soft peaks in a separate bowl. Soak gelatin in cold water till it looks clear and wobbly. Warm a small bit of your mix to melt the gelatin, then stir it all back together.
- Put It All Together:
- Pour pistachio mix halfway up each mold. Pop one raspberry right in the center. Cover with more pistachio mix, making sure there's no air trapped inside. Flatten tops completely - they'll be the bottoms when flipped. Tap gently to get rid of any sneaky bubbles.
- Waiting Game:
- Let them chill at least 4 hours, but better yet, overnight. To get them out, dip molds quickly in warm water. Flip onto plates with quick, confident moves. Top with extra berries and pistachio bits.
 Pin
Pin
My first batch of these domes was a total flop - chunky mixture and stuck-on molds everywhere. After figuring out that soft ingredients and proper gelatin soaking were crucial, I finally cracked the code for perfect results.
 Pin
Pin
Final Thoughts
These fancy little domes have grown to mean more than just dessert in my household - they're what I make when I want someone to feel extra special. For birthdays, anniversaries, or just because, there's something truly wonderful about giving someone their very own perfect little dessert creation. Just remember, don't rush it - the real joy comes from taking it slow and enjoying making something that looks and tastes amazing.
Recipe Questions & Answers
- → Can these be prepped earlier?
- Absolutely! Prep and freeze up to 3 days before serving.
- → Where can I buy pistachio paste?
- Check specialty shops or order it online. Or, blend roasted pistachios for a homemade version!
- → What's the right glaze temp?
- Keep it at 90°F (32°C) for a smooth, even coat.
- → Can I switch molds?
- Yes, use any silicone mold you like, but it might change the number you get.
- → Do I really need gold leaf?
- Nope, skip it if you want! Crushed pistachios or other toppings work just fine.