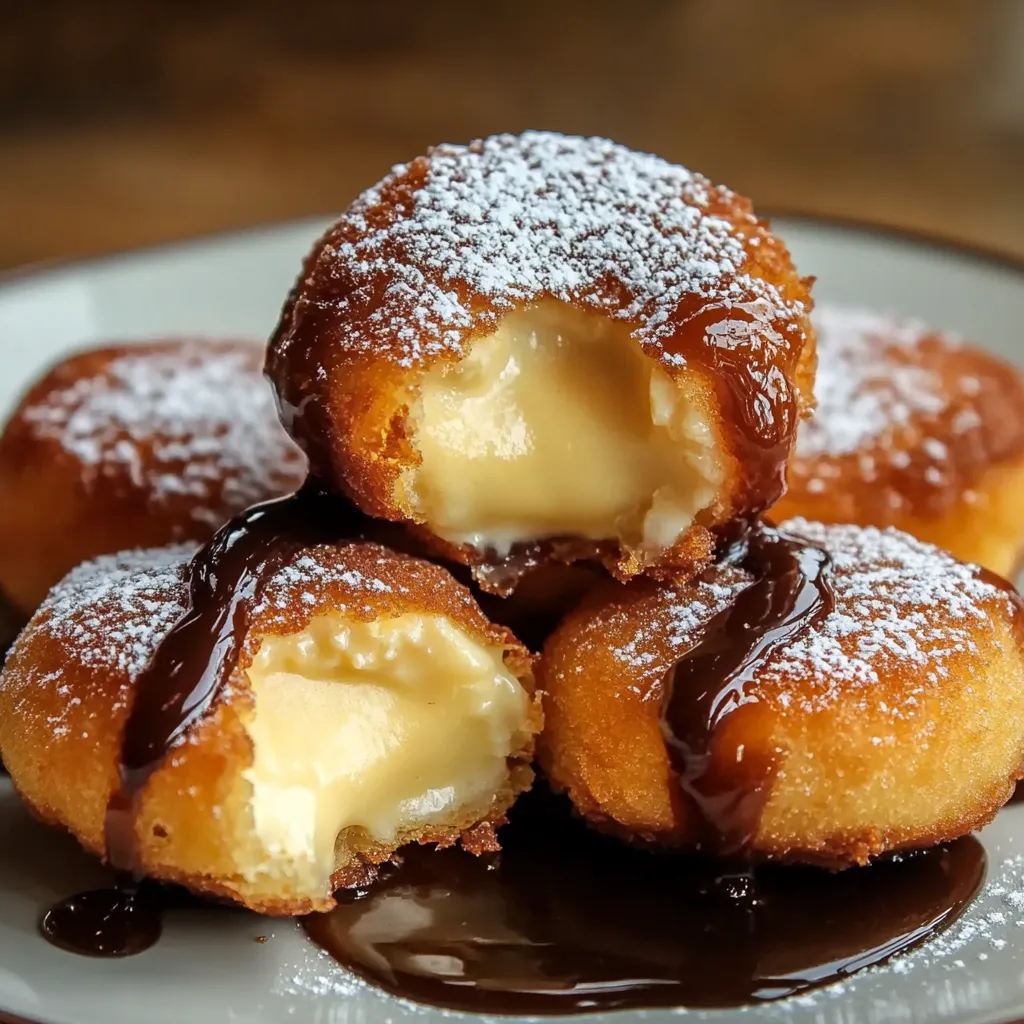
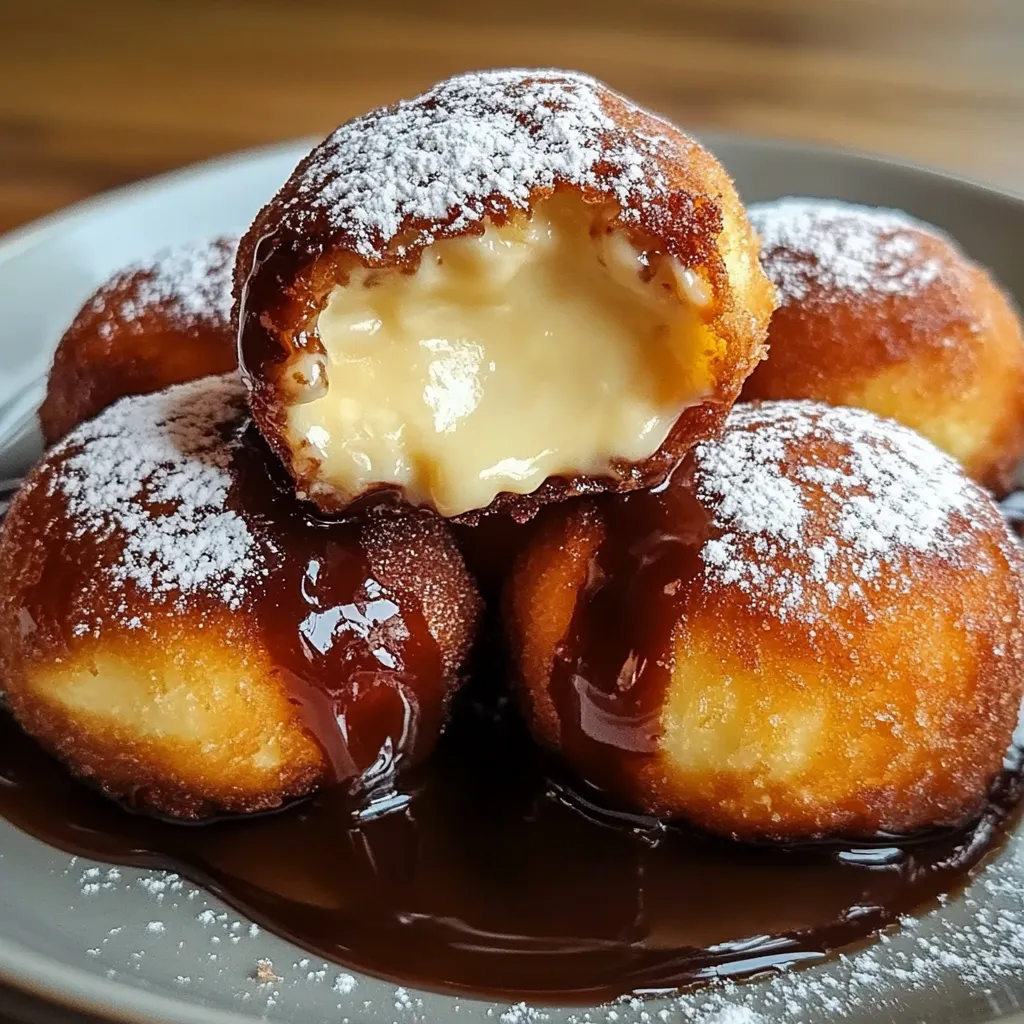
Crunchy fried cheesecake nibbles turn an ordinary dessert into a mouthwatering luxury, offering a crisp, golden outer layer with a silky-smooth inside. These tiny treasures give you an amazing mix of textures - from the satisfying snap of the wrapper to the lush, velvety cheesecake center that dissolves on your tongue.
I stumbled upon these tasty treats at a county fair and got hooked on making them myself. After plenty of tries and many willing samplers, I nailed this version that my folks now ask for at every family party.
Must-Have Ingredients
* Vanilla extract: Real vanilla adds richness and warmth to your filling. You'll notice the difference compared to imitation
* Vegetable oil: Pick a neutral oil that can handle high heat to get that beautiful golden shell
* Spring roll wrappers: These give you that perfect crispy coating and keep all the creamy goodness inside. Go for ones that feel supple and fresh
* Cream cheese: Get the full-fat kind at room temperature for the creamiest, richest filling. Its tanginess works great with the sweet elements
* Sour cream: This hidden hero makes everything extra creamy and nails that authentic cheesecake feel
Making Your Tasty Bites
Wrapper Setup
Spread out your spring roll wrappers and cover them with a damp towel so they stay pliable while you work.
Filling Mixture
Whip the softened cream cheese until it's completely smooth, then mix in sugar until it's light and fluffy. Mix in vanilla and egg until everything's well blended.
Adding The Filling
Put a big spoonful of filling in the middle of each wrapper, but don't go overboard or they'll burst.
Wrapping Technique
Fold the corners in snugly, using water to seal and make secure packages that won't open while frying.
Frying Perfection
Carefully drop the wrapped bites into hot oil, cooking until they turn a lovely golden brown, roughly 2-3 minutes each side.
Oil Temperature
Warm oil to exactly 350°F, and use a thermometer to keep it there throughout the cooking process.
PinDelicious Fried Cheesecake Bites | recipesbytina.com
We found out by accident that if you freeze the wrapped bites for about 30 minutes before frying, you get the most amazing texture combo - a super crispy shell with a filling that stays wonderfully cool and creamy inside.
Perfect Pairings
These yummy treats get even better with some tasty additions. Add warm chocolate sauce or caramel for extra richness. A fresh berry mixture offers a nice tangy contrast to cut the richness. For special events, set up a topping station with different sauces, whipped cream, and chopped nuts so guests can dress up their own treats.
Tasty Twists
Make these bites your own with fun changes that suit your taste. Mix fruit jams into the filling for bursts of fruitiness. Sprinkle in some cinnamon and nutmeg for warm, cozy flavors. Create a version for chocolate fans by adding melted chocolate to the filling. If you're watching what you eat, try using reduced-fat cream cheese or non-dairy options instead.
Storage Secrets
Keep uncooked wrapped bites in the freezer, each one wrapped in plastic and placed in an airtight container. When you're ready to eat them, fry them straight from frozen, just cook them about a minute longer. Already fried bites taste best right away, but you can warm them up in a 350°F oven for 5 minutes to make them crispy again.
These fried cheesecake bites have turned into my go-to dessert for family get-togethers. There's something special about watching people's eyes light up when they crunch through the crispy shell and find the creamy surprise waiting inside. The way the textures and temperatures come together makes something that's truly amazing.
Winning Tips
Getting these bites just right comes down to the small stuff. Don't rush when wrapping each one tightly, and take your time with the frying. Having all your ingredients lined up and ready before you start makes everything go so much smoother.
Make It Your Own
Let what's in season guide your variations. Summer's perfect for adding fresh strawberry swirls, while fall calls for pumpkin spice touches. Think about local flavors and ingredients that might bring something special to these adaptable treats.
Serving Ideas
Getting the timing right matters with these treats. Plan your frying around when you'll serve them for the best results. If needed, you can keep finished bites warm in a low oven, but remember they taste absolutely best when they're fresh from the fryer.
After making batch after batch, I've realized these cheesecake bites hit the sweet spot between careful prep and spontaneous joy. While you need to pay attention to details, the happiness they bring to any gathering makes all the careful steps worth it. Whether you're having a fancy dinner party or just family dessert time, they always create moments of pure dessert happiness.
PinScrumptious Fried Cheesecake Nibbles | recipesbytina.com
Recipe Questions & Answers
→ Why freeze the bites beforehand?
Chilling them keeps the cheesecake firm while frying and stops it from melting in the oil.
→ Can I prep these in advance?
Of course! Make and freeze the bites up to a week ahead. Just fry right before serving.
→ Which oil works best for frying?
Go for neutral options like canola, vegetable, or any oil that handles high heat without burning.
→ How do I know when they're ready?
They’re done when golden brown, which should take 2-3 minutes in 350°F-hot oil.
→ What can I pair these with?
Serve with chocolate drizzle, caramel, berry sauce, or just a sprinkle of powdered or cinnamon sugar.
Fried Cheesecake Snacks
Bites of rich cheesecake wrapped in a crunchy, golden outside. Perfect for special get-togethers or simple sweet cravings.
10Cinnamon sugar (totally optional but adds extra yum!)
11Oil for frying
Steps to Follow
Step 01
Mix softened cream cheese with icing sugar and vanilla until it’s creamy and smooth, making sure there are no lumps anywhere.
Step 02
In another bowl, combine the flour, cornstarch, baking powder, and salt. Add the egg and milk, whisking everything together until it’s smooth and like pancake batter.
Step 03
Scoop small portions of the cheese mixture onto a tray, then toss it into your freezer for at least an hour. This helps keep them from getting messy during frying.
Step 04
Heat oil to a sizzling 350°F. Coat the frozen cream cheese balls in the batter, then fry them in the hot oil for around 2-3 minutes. They should turn crispy and golden.
Step 05
Roll the hot, freshly fried bites in cinnamon sugar for extra flavor. Make sure you eat them while they’re warm for the best crunch and creaminess!
Additional Notes
The creamy centers and crunchy coating taste best if eaten hot and fresh.
Freezing the filling is non-negotiable if you don’t want them falling apart in the oil.
Drizzle some chocolate or caramel on the side for dunking fun!
Tools You'll Need
Fryer or deep skillet
Bowls for mixing
Whisk or fork
Flat tray for freezing
Paper towels to drain oil
Allergy Information
Check every ingredient for potential allergens. Consult a healthcare professional for concerns.
Has dairy (milk, cream cheese)
Includes eggs
Contains gluten (wheat flour)
Nutrition Info (Per Serving)
These details are for informational purposes and don’t replace medical advice.

 Pin
Pin
 Pin
Pin
 Pin
Pin