
 Pin
Pin
Simple Banana Peanut Butter Cookies Everyone Can Make
I stumbled upon this idea when I spotted an overly ripe banana on my kitchen counter. These treats have now become what my family begs for weekly. They've got that perfect chew, tons of nutty peanut flavor, and sweet chocolate bits throughout. And guess what? You won't need flour, which means cleanup is a breeze!
The Reason They Never Leave My Kitchen
These cookies have taken over my baking routine for good reason. They turn out great even when I'm sloppy with measurements. The protein from the peanut butter makes me feel good about sneaking them into my kids' lunchboxes. And without fail, anyone who bites into one wants to know how to make them themselves.
What You'll Need
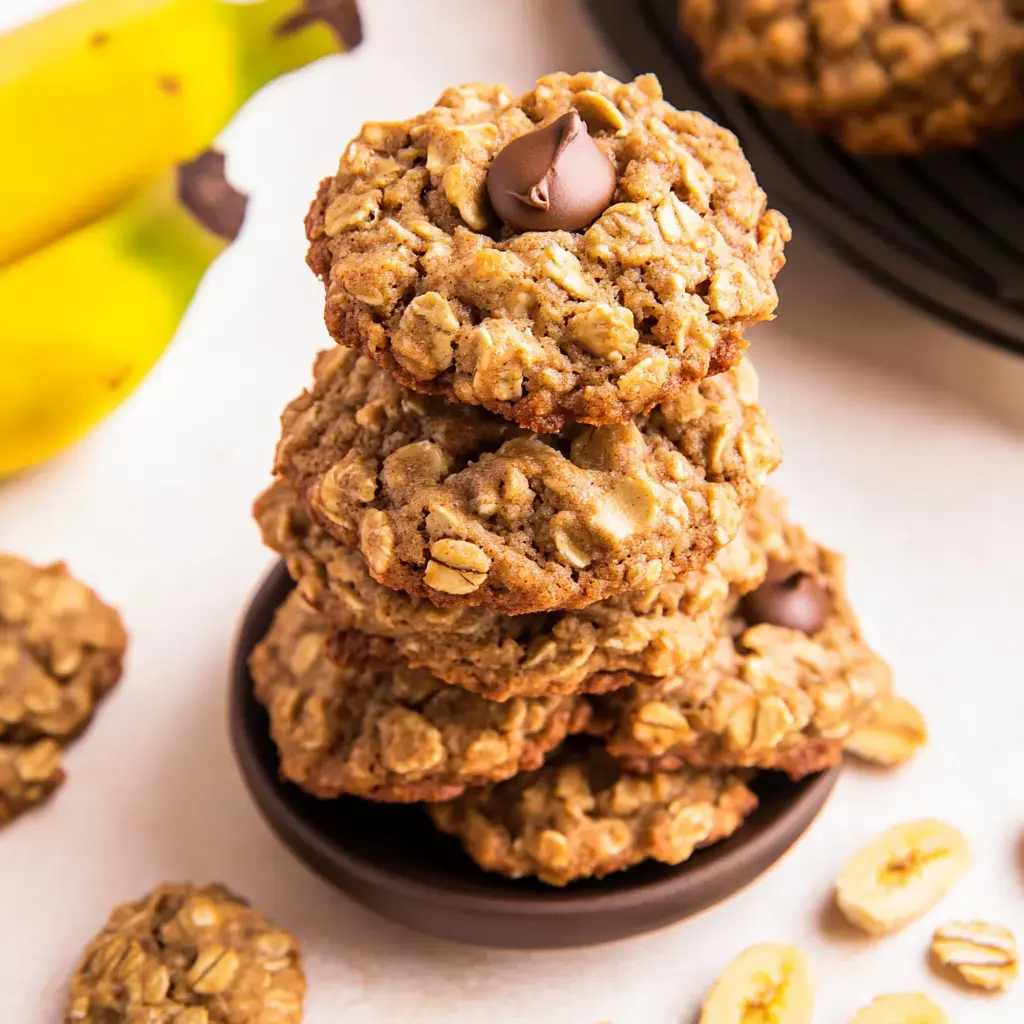
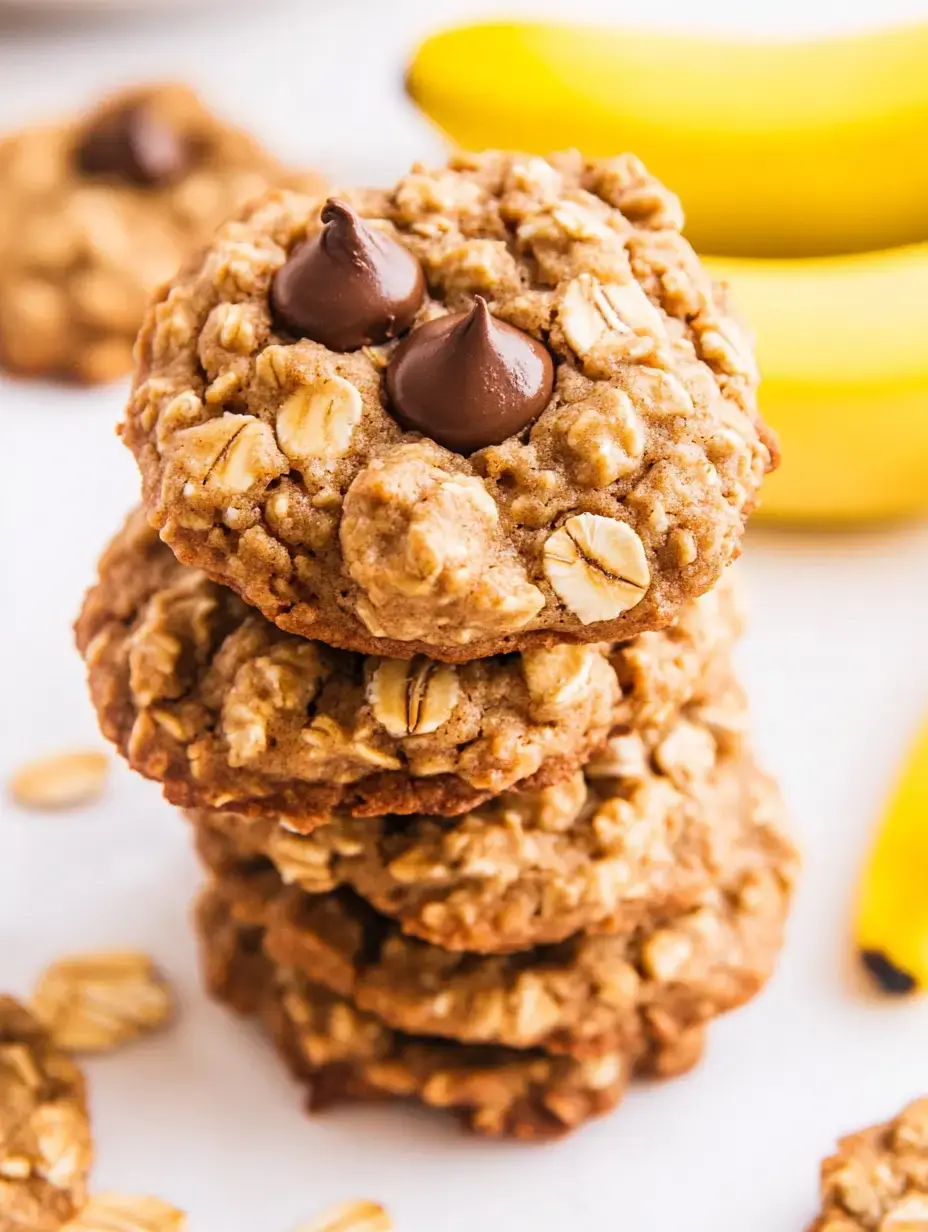
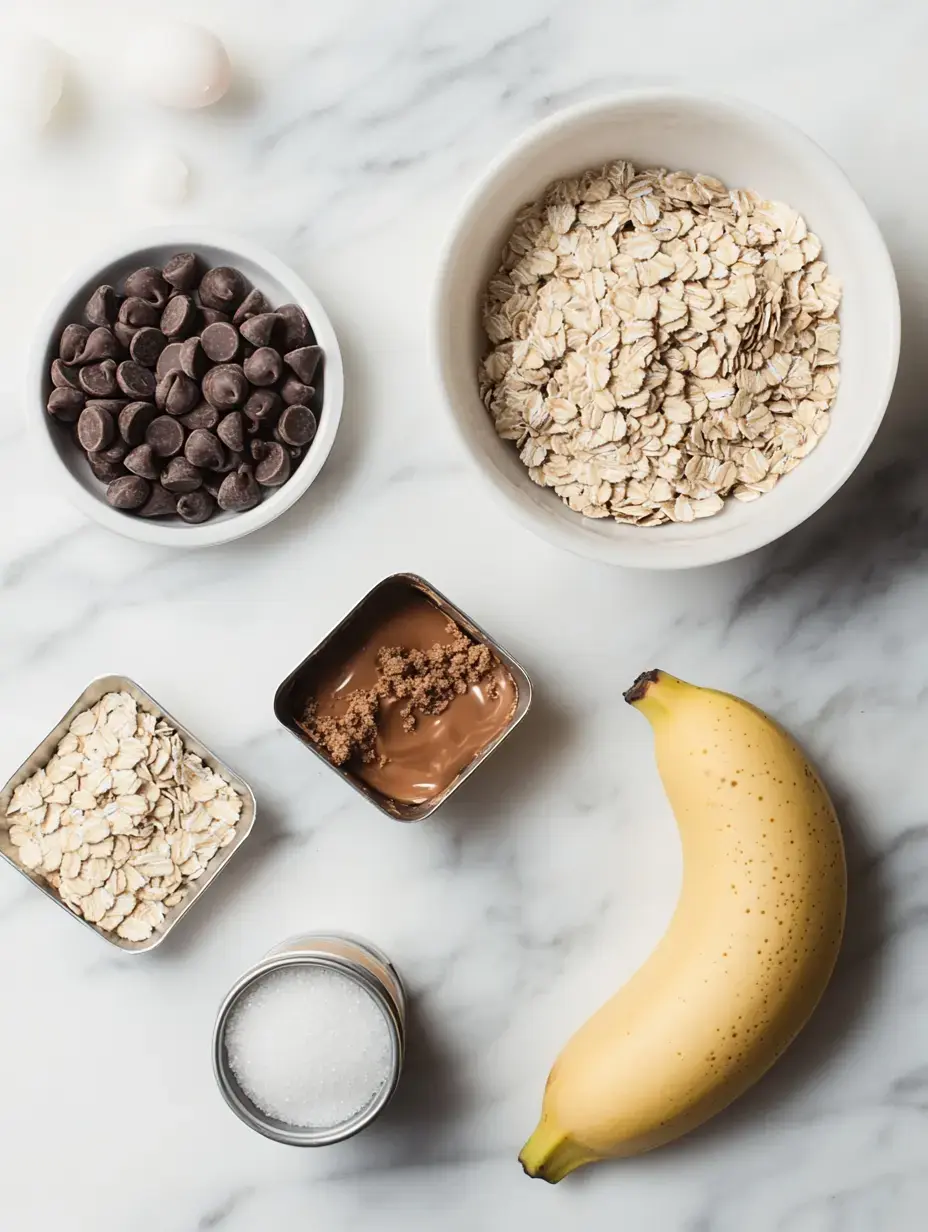
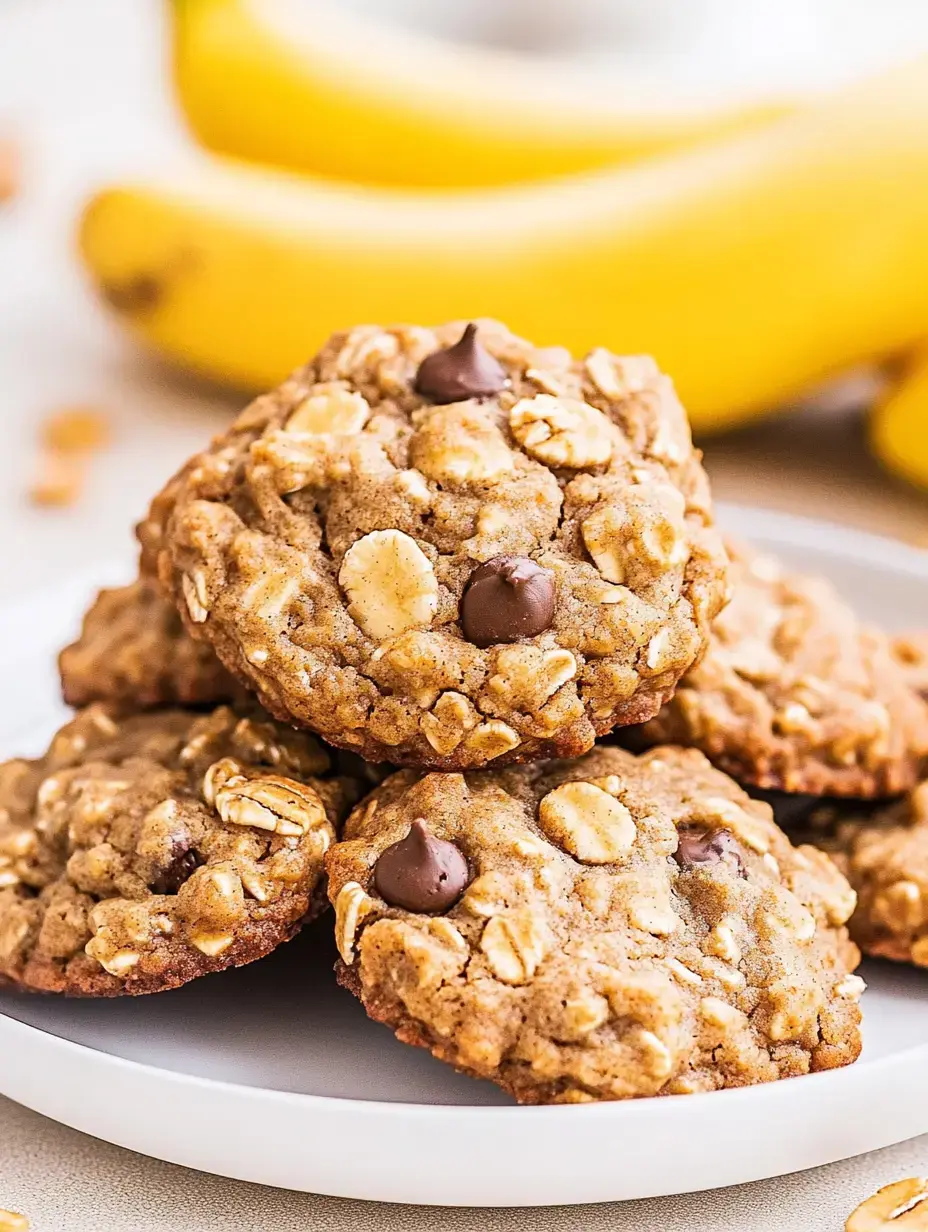
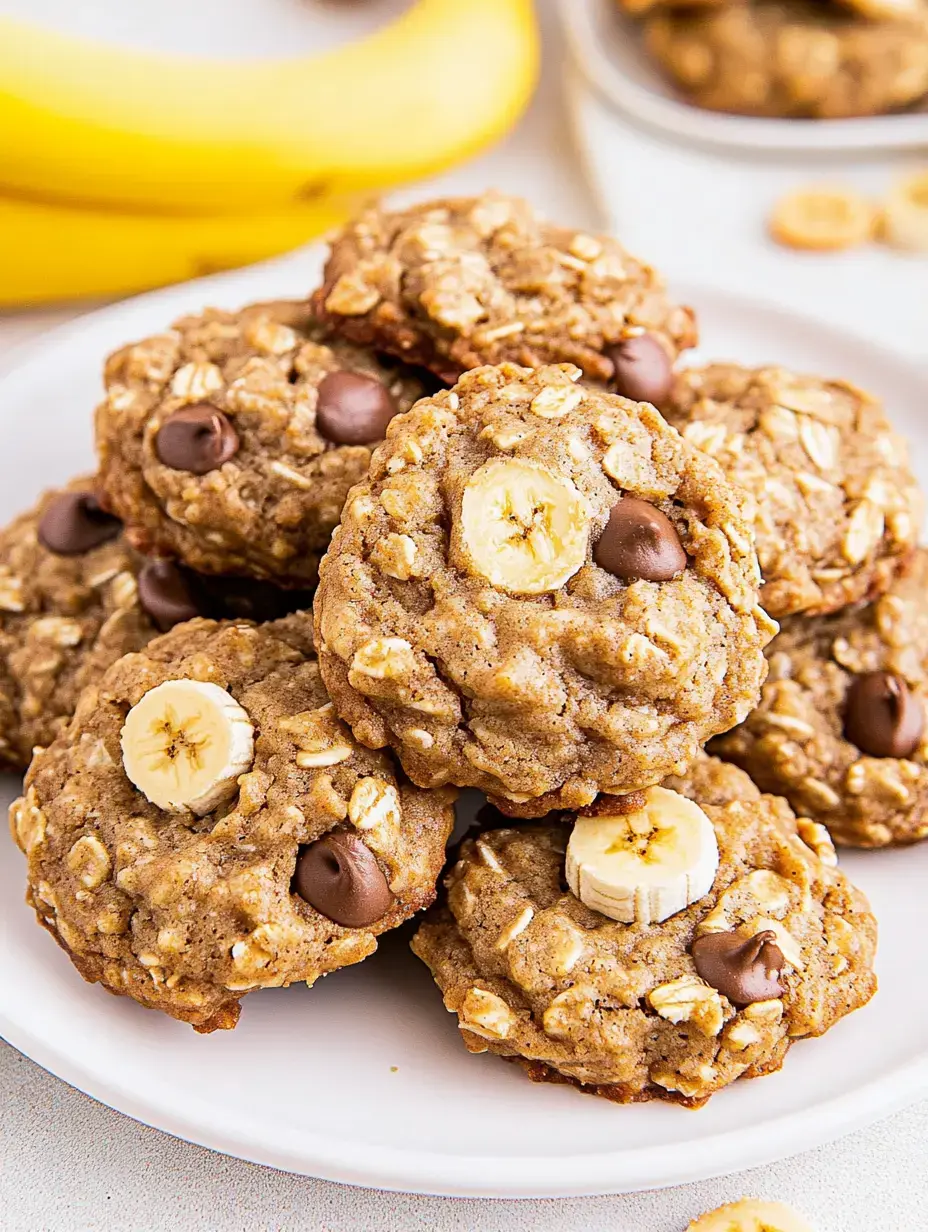
- Banana: Pick one with dark spots for extra sweetness
- Peanut Butter: Smooth regular kind gives the best results
- Brown Sugar: Just 1/3 cup delivers perfect sweetness
- Egg: A single large one, set out beforehand
- Quick Oats: My trick for getting that ideal texture
- Baking Soda: Only need 1/2 teaspoon
- Salt: A small pinch enhances everything else
- Chocolate Chips: Semisweet works great but choose your favorite
Baking Instructions
- [Combine Wet Stuff First]
- Squish that banana completely, then stir in your peanut butter, brown sugar, and egg. A hand mixer works great, but don't worry if you only have a spoon.
- [Toss In Dry Elements]
- Add your oats, baking soda and salt. Mix until just combined, then gently drop in the chocolate chips.
- [Form Your Cookies]
- Give the mixture a couple minutes to sit. I grab my cookie scoop so they're all uniform.
- [Baking Time]
- Pop them in at 350°F and wait until the edges turn slightly golden. Don't leave them in too long or you'll regret it.
 Pin
Pin
The Story Behind Them
I came up with these when trying to save those last mushy bananas nobody wants. I wondered what would happen if I threw one into my peanut butter cookie mix. The outcome was so fantastic I kept making them again and again.
Why They're So Tasty
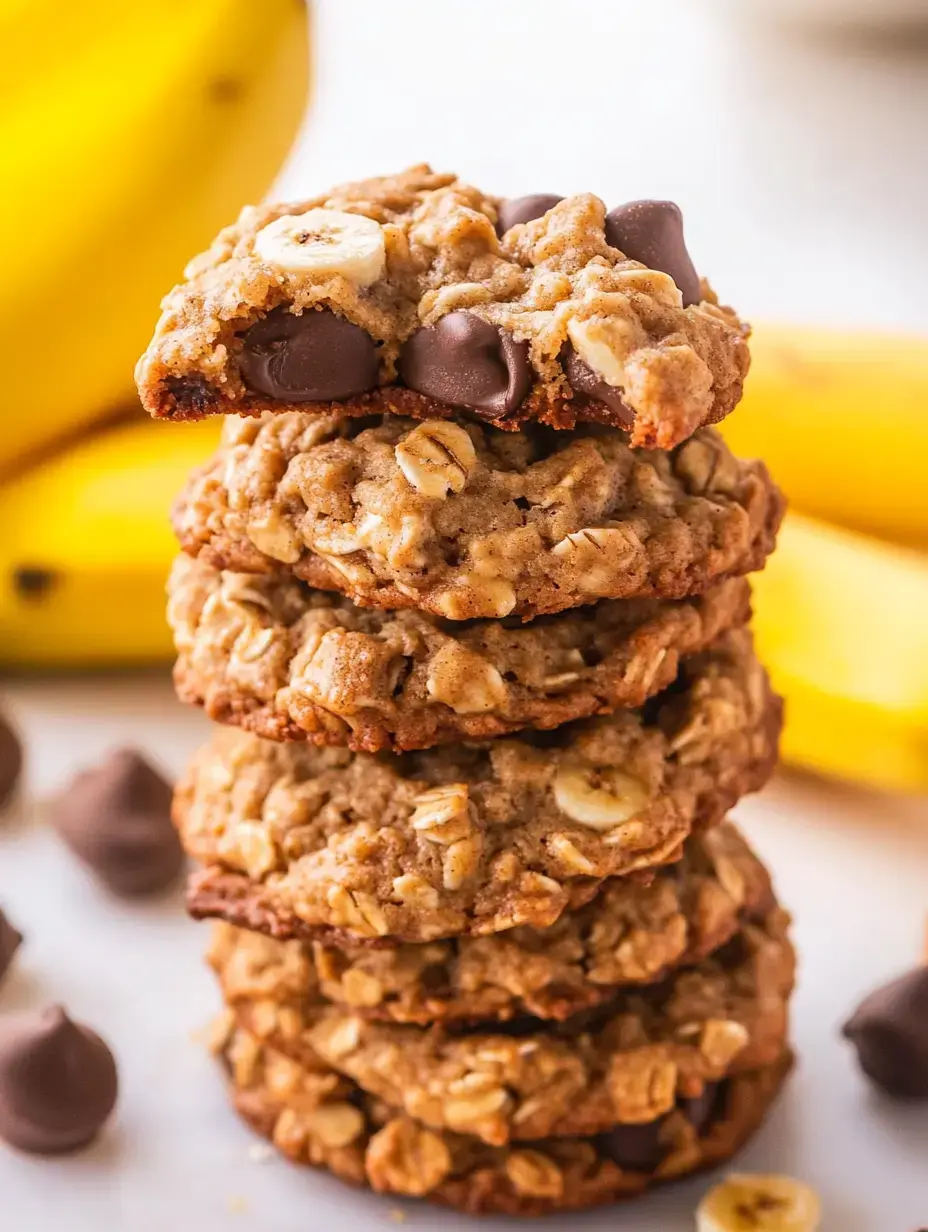
These cookies pack something special in every bite. The banana keeps everything moist, the peanut butter brings that deep nutty taste, and those chocolate chips create little sweet spots throughout. My children say it's like eating banana bread and peanut butter cookies at the same time.
Keeping Them Fresh
They rarely stick around long at my place, but when we have extras I put them in a sealed container. They'll stay good about 4 days. Sometimes I warm one up for 10 seconds so the chocolate gets all melty again.
Switch Things Up
Want them gluten free? Just use certified GF oats. Trying to cut sugar? You can try different sweeteners instead. I've even made them with reduced fat peanut butter when that's all I had left.
 Pin
Pin
What Not To Do
Let me save you some trouble from my mistakes. Green bananas won't cut it, so don't even try. Make sure to use quick oats, not other kinds. And don't skip letting the dough rest. These small things turn okay cookies into amazing ones.
Choosing Your Spread
I've tested tons of batches and found that regular creamy peanut butter works best. Natural kinds often make them too oily. If you want some crunch, try chunky peanut butter, just know your cookies might fall apart easier.
The Right Oats Matter
Quick oats are what you want for these cookies. They give you that awesome chewy feel without being too heavy. Got old fashioned oats? Just blitz them quickly in your food processor. Stay away from instant oats though, they'll turn mushy.
Chocolate Options
While I usually grab semisweet chips, you can really go with whatever you like. Dark chocolate makes them seem fancy, milk chocolate adds extra sweetness. I sometimes throw in peanut butter chips too for more nutty goodness.
 Pin
Pin
Nailing That Perfect Bite
Don't go crazy with mixing. Just stir until everything comes together, then stop. Let the dough sit for those 5 minutes. Trust me, it really helps them hold their shape better.
Forming Your Treats
A cookie scoop makes everything uniform so they all cook the same. If your hands get sticky, just wet them a bit. Remember to leave plenty of space on the baking sheet since they spread out while cooking.
Last Steps
After baking, let them stay on the hot sheet for a few minutes. They're super soft at first but firm up as they cool down. Try sprinkling some sea salt on top sometimes, it makes the chocolate taste even better.
What To Serve With Them
My kids always want cold milk with these. I like mine with afternoon coffee. For a real treat, try crumbling one over vanilla ice cream when you're feeling fancy.
 Pin
Pin
Sharing With Friends
These always vanish first at school bake sales and family gatherings. You can double the batch easily when you need more, and they travel really well. Just put some wax paper between layers so they don't stick together.
Try New Additions
Don't be afraid to get creative. Sometimes I add shredded coconut or dried cranberries. My little girl loves when I swirl in some strawberry jam, making them taste like a PB&J sandwich in cookie form.
Cutting Calories
Looking for a lighter version? Try swapping some sugar with mashed ripe dates or using dark chocolate instead of milk. They'll still taste amazing but won't be quite as indulgent.
Why They'll Win You Over
These treats have become my backup plan when I need something fast and tasty. They're perfect for those spotty bananas nobody wants to eat, and they always make people smile. Give them a shot and I bet they'll become your go-to as well.
 Pin
Pin
Recipe Questions & Answers
- → Can I use natural peanut butter?
- Stick to smooth peanut butter—the type with added oil can make the dough too crumbly. Classic creamy works best.
- → How ripe should the banana be?
- Let them get nice and spotty for extra sweetness and easy mashing. The riper, the better!
- → Can I add other mix-ins?
- Feel free! Swap chocolate with nuts, seeds, or dried fruit. Just keep all extras to 1 cup total so they don’t overpower the dough.
- → How do I store these cookies?
- Pop them in an airtight container for up to 3 days. Layer between parchment if freezing for 3 months.
- → Are these cookies really gluten-free?
- Use oats labeled gluten-free to avoid cross-contact with wheat. Regular ones might not meet the gluten-free standard.