
 Pin
Pin
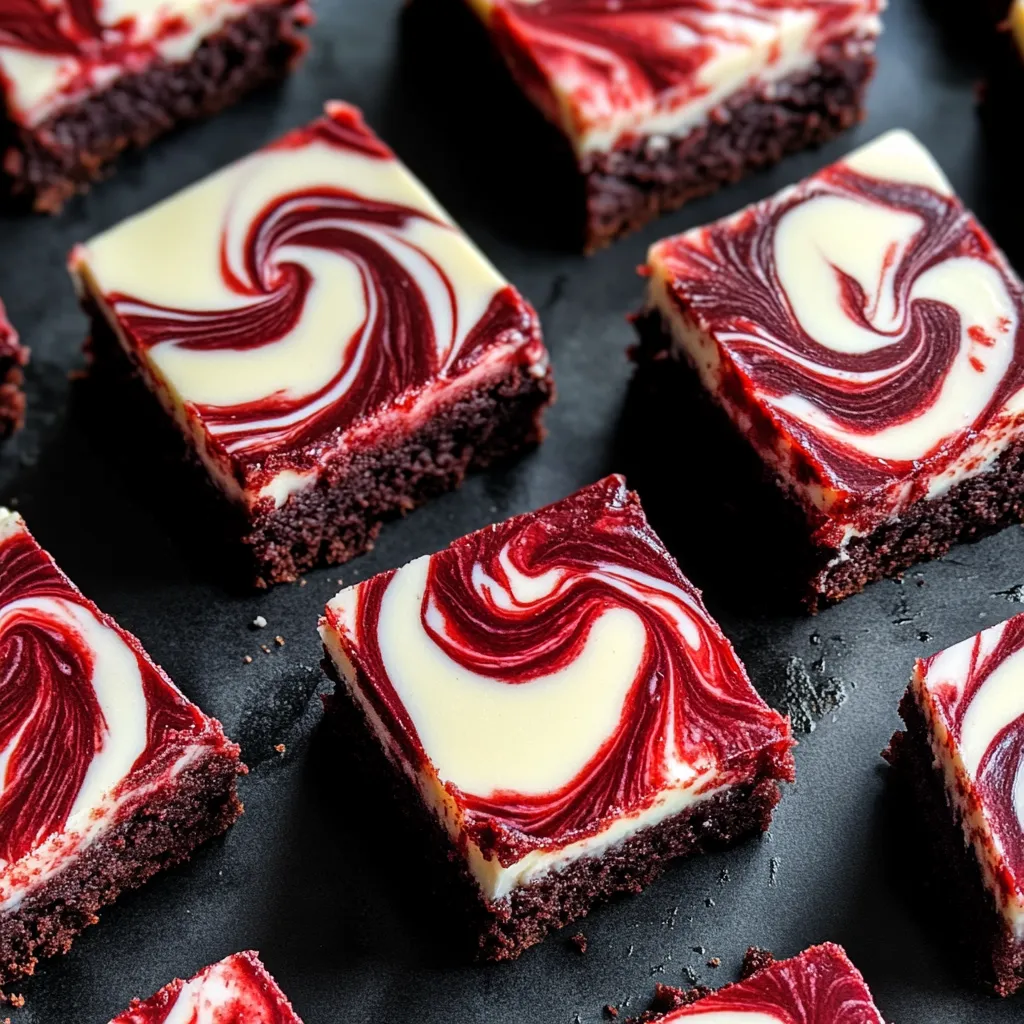
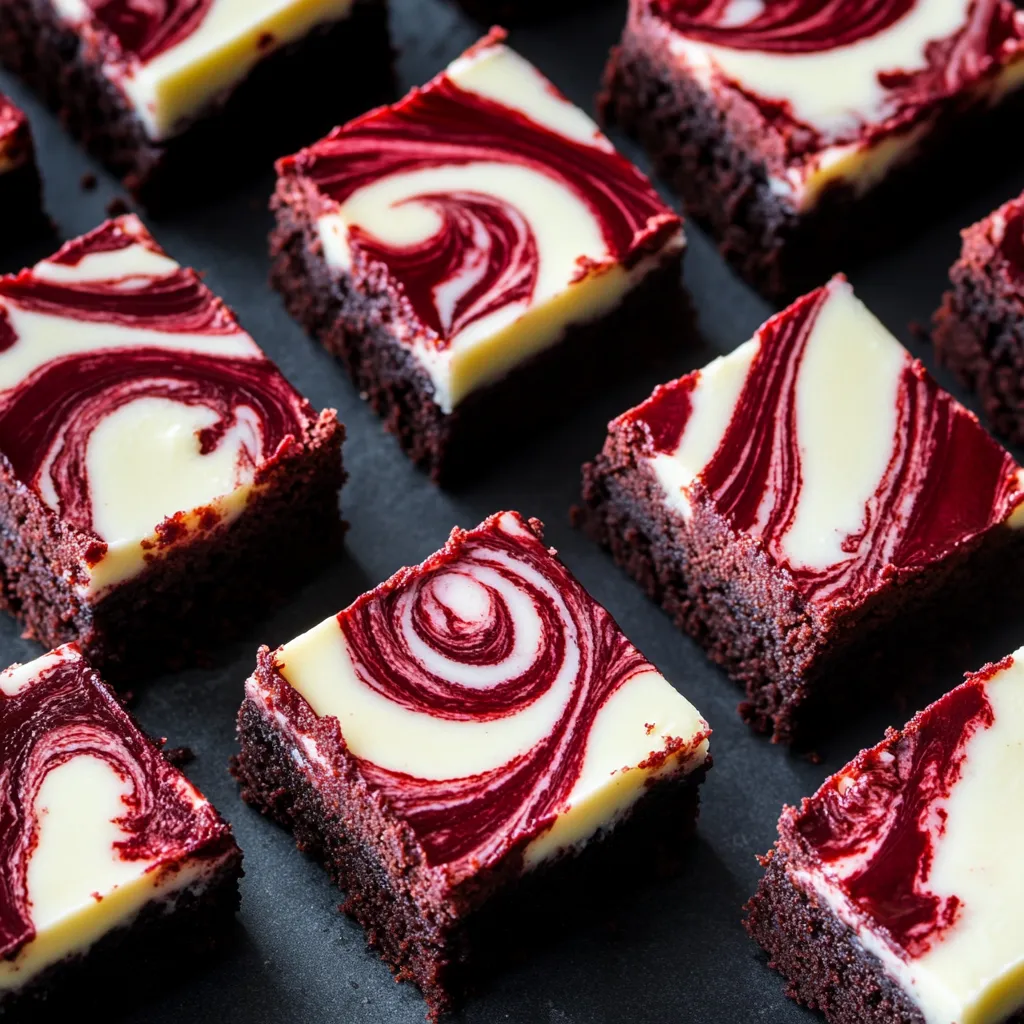
Smooth layers of rich chocolate blend with twisty ribbons of creamy cheesecake to make an unforgettable dessert that's way better than regular brownies. The eye-catching mix of deep red brownie mix and bright white cheesecake creates a swirled treat that tastes just as good as it looks. Each bite gives you the perfect mix of deep chocolate flavor and tangy cream cheese.
I first made these brownies for a family get-together and they vanished in seconds. Everyone noticed the pretty red and white swirls right away, but it was how the textures played together that kept everyone coming back for more. My kids now ask for these instead of cake on their birthdays - there's no better thumbs-up than that from my home's pickiest eaters.
Key Ingredients
- Unsalted Butter: Gives that yummy, soft texture that makes brownies so good. Fancy European butter with extra fat really makes the flavor pop.
- Granulated Sugar: Adds the sweetness you need and helps create that crackly top brownies are known for.
- Eggs: They hold everything together and add richness. Let them sit out first so they mix in better.
- Red Food Coloring: Makes these brownies look amazing with bright color. Gel coloring works best since it won't make your batter runny.
- Cocoa Powder: Brings all that chocolate flavor without making heavy brownies. Dutch-processed tastes smoother and less sharp.
- All-Purpose Flour: Gives just enough structure while keeping brownies fudgy. Weighing it instead of using cups makes them turn out the same every time.
- Cream Cheese: The main player in the cheesecake part. Full-fat makes it extra creamy.
- Vanilla Extract: Makes both layers taste better. Real vanilla instead of fake stuff really does matter.
Making Your Masterpiece
- Getting Ready:
- Heat your oven to 350°F on the dot for perfect baking. Put parchment paper in your pan with extra hanging over the sides so you can lift the brownies out easily later.
- Brownie Base:
- Melt butter completely in the microwave or on the stove until liquid but not hot. Mix in sugar until it's all combined and slightly thick. Add eggs one by one, making sure each one is fully mixed in before adding the next. This helps everything blend just right.
- Adding Dry Stuff:
- Sift the cocoa powder right into your wet mix to avoid lumps, then add flour, salt, and baking powder. Fold in chocolate chips with a rubber spatula, making sure they're spread out evenly in the batter.
- Making The Bottom Layer:
- Pour brownie mix into your pan and spread it out evenly, pushing it into the corners and smoothing the top. This thin layer will be the fudgy base for your two-in-one dessert.
- Making Cheesecake Mix:
- In another big bowl, beat softened cream cheese with a mixer until it's completely smooth with no lumps, about 2 minutes. This puts air in it for the right cheesecake feel. Mix in fine sugar and vanilla on low speed first, then medium until it's fluffy. Add an egg and beat until everything looks glossy and smooth.
- Putting Layers Together:
- Drop spoonfuls of cheesecake mix all over the brownie layer, then use a flat spatula to gently spread it out evenly without messing up the brownie layer underneath. Don't worry about making it perfectly smooth—a little texture looks homemade and nice.
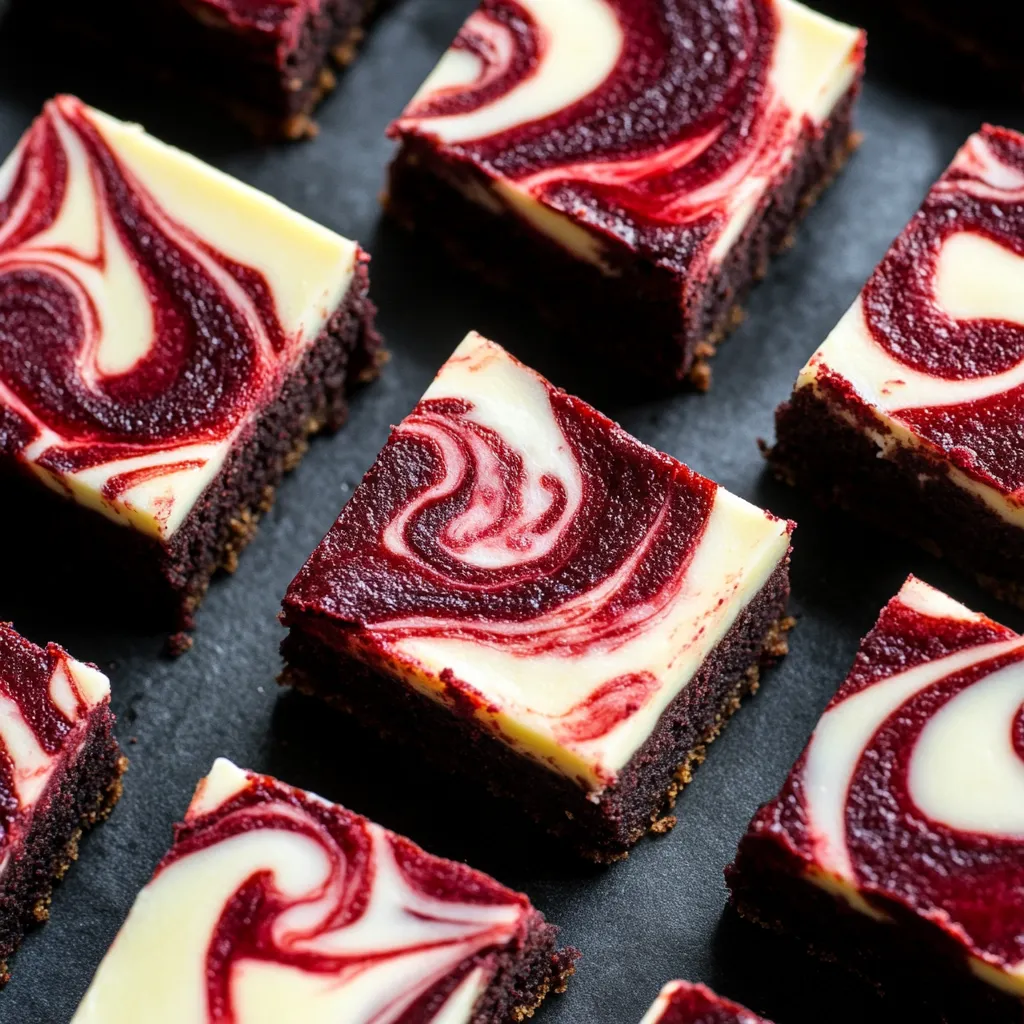
- Creating Pretty Swirls:
- Warm the red food coloring in the microwave for 15-20 seconds until it's just runny enough to drizzle. Use a small spoon to drop it across the top, then drag a knife or toothpick through all the layers to make pretty patterns without mixing too much.
- Baking It Up:
- Put the pan on the middle rack of your hot oven and bake for 25-30 minutes until the edges of the cheesecake part look set and golden but the middle is still a bit soft. A toothpick stuck in should come out with a few damp crumbs but no wet batter.
- Cooling Down:
- Let brownies cool completely in the pan on a wire rack, which might take 1-2 hours. Being patient pays off with perfectly set brownies that cut cleanly. For extra neat slices, stick them in the fridge for 30 minutes after they reach room temperature.
 Pin
Pin
My grandma always taught me to be patient when making layered desserts. I can still picture her gently tapping my hand when I tried to cut into her famous brownies before they'd cooled enough. 'Just wait a bit longer,' she'd tell me with a knowing look. That lesson really applies to these brownie cheesecake squares—they change completely with proper cooling time, going from a hot, messy blob to perfect, clean-cutting squares with clear layers.
Tasty Combinations
These brownie cheesecake squares go great with lots of different things for amazing desserts. Try warm squares topped with vanilla ice cream for a yummy hot-cold combo. Coffee fans will love having these with a cappuccino mixed with thick Greek yogurt, cinnamon sprinkles, and a touch of honey. For parties, make a fancy display by putting squares next to fresh raspberries, strawberries dipped in chocolate, and whipped cream to add color that goes well with the rich chocolate and tangy cheesecake parts.
Mix It Up
Change this flexible recipe to make exciting flavor combos based on what you like or what's in your kitchen. If you love peanut butter, swirl 1/4 cup of smooth peanut butter into the cheesecake part before adding powdered sugar, making a nutty twist that's great with chocolate. White chocolate fans can swap white chocolate chips for regular ones in the brownie mix for a lighter version that's my sister's favorite. Make a fall-themed batch by adding 1 teaspoon of pumpkin spice to the brownie mix and swirling pumpkin butter into the cheesecake layer. For extra crunch and flavor, sprinkle 1/2 cup of toasted chopped nuts like walnuts or pecans between the brownie and cheesecake parts.
Keeping Them Fresh
Keep these tasty bars fresh with the right storage methods. Store them at room temperature in an airtight container for up to 3 days, putting parchment paper between layers so they don't stick together. To keep them fresh longer, store them in the fridge in a cake container, but let them warm up before eating for the best taste and texture. These bars freeze really well too—wrap each piece in plastic wrap, then foil, and freeze for up to three months. Thaw overnight in the fridge then let sit out for about an hour before eating, or warm them slightly in a 300°F oven for 5-10 minutes to make them taste freshly baked.
These chocolate cheesecake brownies have turned into my go-to dish for potlucks, and friends and family always ask me to bring them to gatherings. What makes them so special is how something so simple can instantly put you in a better mood. The mix of deep chocolate, smooth cheesecake, and bright chocolate chips creates something that's better than each part on its own. Even my friends who usually pass on desserts have been won over after trying these treats.
 Pin
Pin
Recipe Questions & Answers
- → Can I leave out the food dye?
- Sure, skip or cut back the dye. The taste stays the same but won’t have that vibrant velvet color.
- → How do I know the brownies are baked?
- Test with a toothpick—it should have just a few crumbs, not wet batter. The center should look set but feel a bit soft.
- → Why do I need to refrigerate them?
- The cheesecake layer requires chilling for safety. Plus, refrigeration firms them up and makes slicing neat.
- → Can these brownies be frozen?
- Yes! Wrap them tight and freeze for up to three months. Let them thaw in the fridge overnight before enjoying.
- → Why did my cheesecake top crack?
- Cracks can come from overbaking or cooling too fast. Next time, bake shorter and let them cool slowly on the counter.