
 Pin
Pin
Our Polar Bear Treats began as a casual baking adventure with the grandkids one winter and quickly turned into our yearly holiday must-do. When you mix soft cream cheese dough with fluffy buttercream topping, you get the cutest little bears around. My kitchen's filled with giggles whenever we add those chocolate chip noses, tiny sprinkle eyes, and that sparkly sugar coating. Seeing my grandkids' excited faces while they craft their own fuzzy friends makes cleaning up all that powdered sugar totally worth it.
Irresistible Holiday Treats
What makes these cookies so good? It's definitely the cream cheese in the mix. It keeps them super soft and adds a tiny bit of tang that works so well with the sweet buttercream on top. I'm always happy they don't lose their shape in the oven, so each bear stays nice and round. We've come up with so many different ways to dress them up over the years, which means no two batches ever look the same.
What Makes These Family Favorites
You'll find these polar bear treats at all our winter get-togethers. They've become the star of our dessert spread and always get oohs and aahs from everyone who visits. My granddaughter takes them to school sales where they're gone in seconds. Folks can't get over that special cream cheese flavor and always want to know how to make them. But the best part? Decorating them together has turned into one of our favorite family bonding times.
Tools You'll Need
First, grab your mixing bowls, rolling pin and cookie cutters. I go with round ones - bigger circles for the faces, smaller ones for ears, but really any size will do. Put some parchment or silicone mats on your baking sheets (I think silicone works better for even cooking). Don't forget to set up your piping bags with medium round tips for all the frosting details. I've made these bears so many times now, and trust me, having everything ready to go makes the whole thing run smoother.
 Pin
Pin
Starting The Cookie Wonder
First, blend your soft butter with cream cheese until they're nice and smooth. Then add sugar and keep mixing until it looks light and fluffy, which usually takes my mixer about three minutes. Put in your egg and vanilla, then slowly mix in all the dry stuff. Don't worry if the dough feels soft, that's just what we want. Cut it in half, wrap it up, and let it cool in the fridge for at least two hours. When I know we're baking with the grandkids tomorrow, I often make this dough the night before.
Shaping Our Cuddly Faces
After your dough is properly chilled, turn your oven on to 350°F. Roll the dough out on a surface with just a bit of flour until it's about a third inch thick. Use your cutters to make big circles for faces and tiny ones for ears. My granddaughter can't wait for this part, especially sticking those little ear circles onto the tops of our bears. Put them on your ready baking sheets and stick them back in the fridge for 15 minutes. This extra cooling step keeps them from getting flat and helps them stay nice and round.
Baking Away
Keep an eye on these little guys while they're in the oven, about 12 to 14 minutes should do it. You want them just set around the edges but not turning brown. Let them sit on the hot baking sheet for about 5 minutes before moving them to a cooling rack. At this point my kitchen smells amazing and the kids always crowd around waiting to start the fun decorating part.
Whipping Up Our Frosting
While your cookies cool down, let's get the frosting ready. Mix your room temp butter until it's smooth, then add vanilla and salt. Slowly put in your powdered sugar with small splashes of heavy cream between additions. Keep going until it's all fluffy and light. You need it just right for piping, not too thick but not runny either. I've done this so many times I can tell just by looking when it's exactly right.
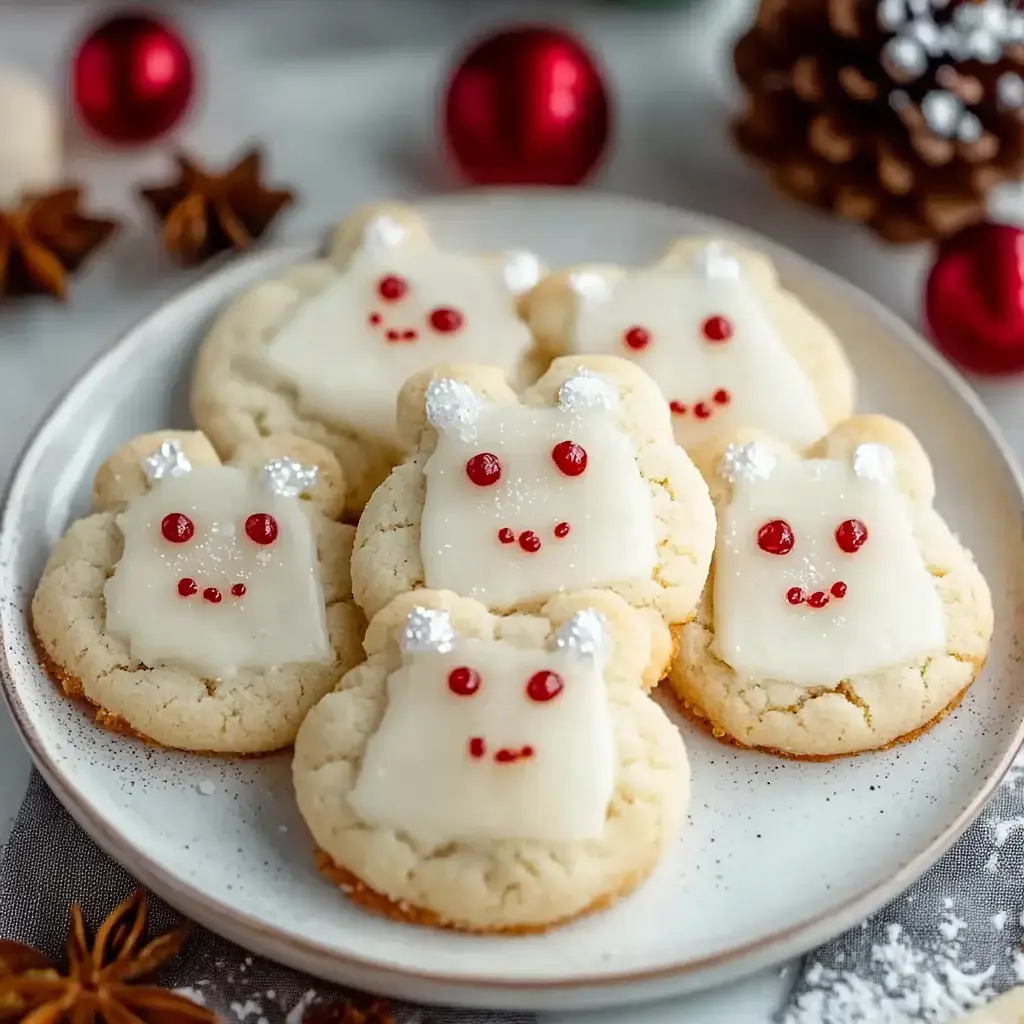
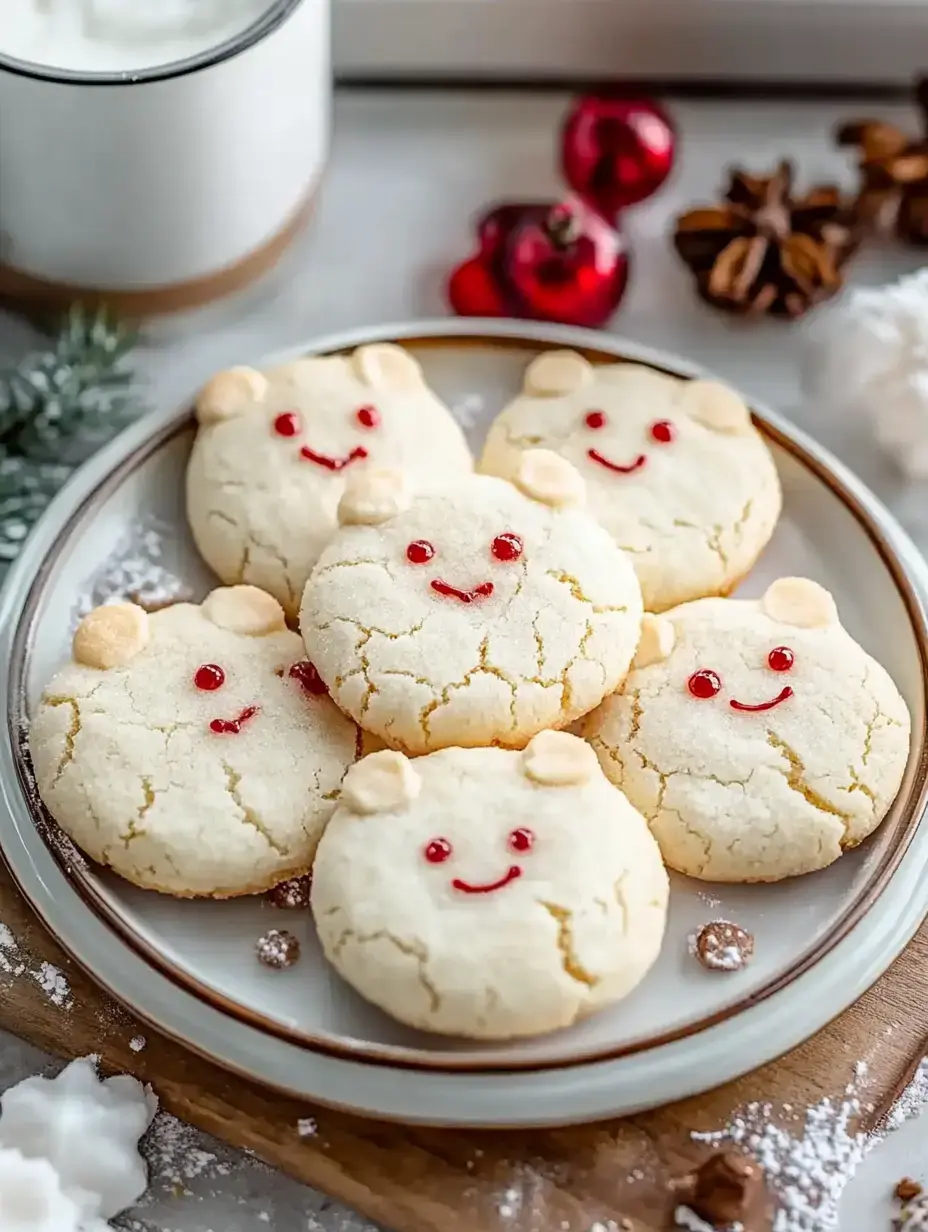
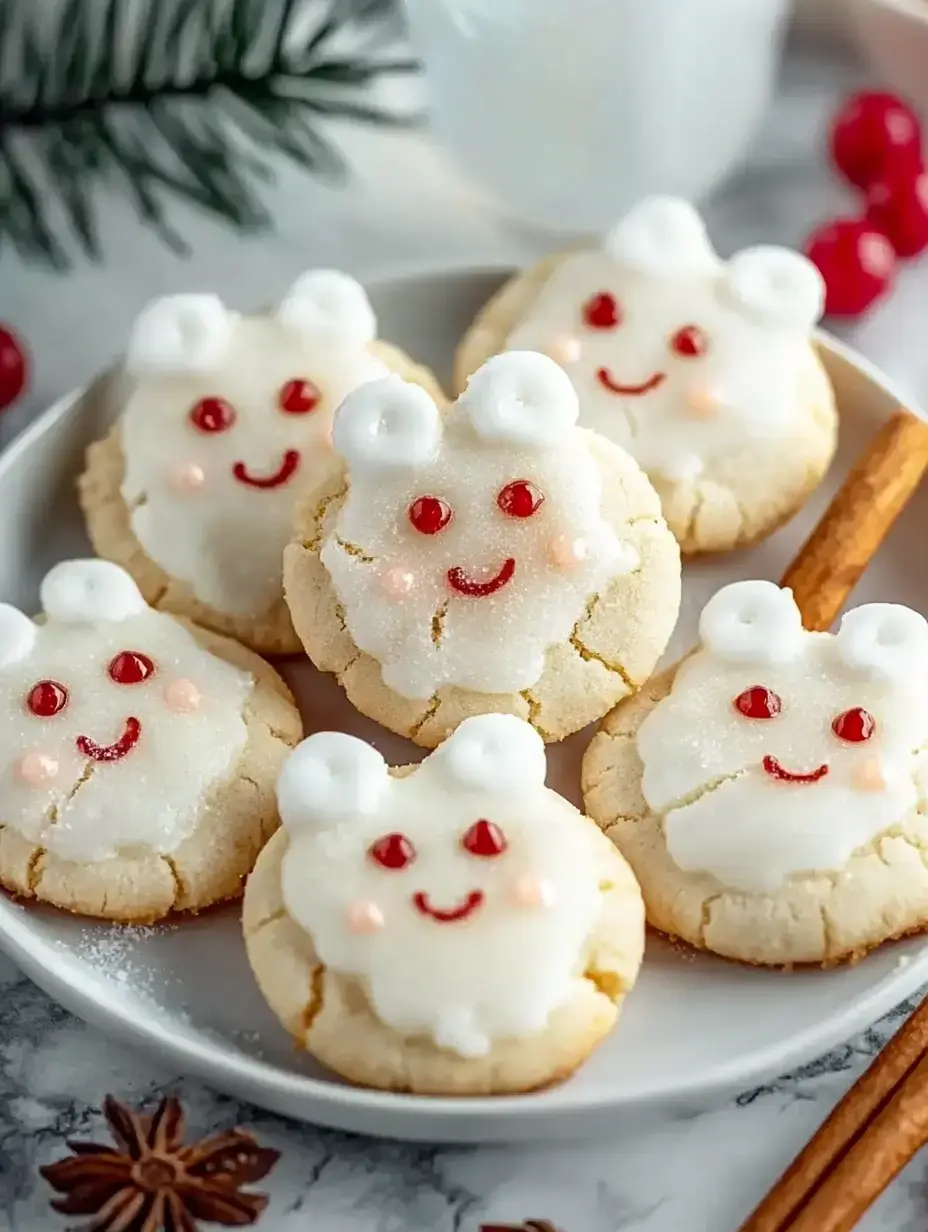
Giving Bears Their Personality
Now comes the best part. Start by putting a thin layer of buttercream on each cookie, then dunk them in white sugar crystals. This gives them that fuzzy polar bear look we want. Add a little frosting bump for the muzzle, then stick on a chocolate chip nose. Black sprinkles work great for eyes, and pink ones give them sweet rosy cheeks. Each bear turns out looking different, which is what makes them so fun to create.
Tips For Flawless Bears
After making tons of these cookies, I've picked up some handy tricks. Always make sure your dough is really cold before baking, it totally helps them keep their shape. Take them out when they're barely done, as they'll finish cooking on the hot pan. Put your sugar coating on while the frosting's still wet so it sticks well. And my number one rule? Just have fun decorating them, there's no wrong way to make your bears look cute.
Storing Your Cute Creations
Put your finished bears in a sealed container and they'll stay good for about two days on your counter. Want them to last longer? Stick them in the fridge for up to five days. Just remember to bring them back to room temp before you serve them. You can even freeze the plain cookies without frosting for a whole month, which is great for getting ahead during the crazy holiday rush.
Warm Thoughts From My Home
Each time we make these bears, I can't help thinking about all those cozy winter afternoons baking with my family. They've become such an important part of how we celebrate holidays, showing up at cookie exchanges, family dinners, and school parties. I hope they'll bring your family as much happiness as they've brought to mine. Just remember that each little bear has its own look, just like the hands that made it.
 Pin
Pin
Final Thoughts
Festive and cute, these polar bear-inspired cookies bring soft, melt-in-your-mouth cream cheese dough together with buttery frosting decorations. They're a perfect addition to holiday fun or any family baking day!
Recipe Questions & Answers
- → Why chill the dough before baking?
Cold dough keeps the cookie shapes neat and ensures they don’t spread too much while baking, helping to keep all those cute bear details perfect.
- → Can you prepare these ahead of time?
Yes! You can freeze the dough for up to 3 months or bake the cookies and wait to frost them. Decorated ones are fine for 2 days on the counter or 5 in the fridge.
- → What does cream cheese do for cookies?
The cream cheese makes these extra tender with a slight tangy kick that balances out the sweetness. Plus, it ensures a dreamy, soft texture.
- → Are frosted cookies freezer-safe?
Plain cookies freeze well, but once frosted, they might lose their decorations. It's best to just refrigerate the decorated ones.
- → What works as a sanding sugar substitute?
If you don’t have sanding sugar, regular sugar can provide a similar look, just less sparkly. Shredded coconut also works for a different texture.