
 Pin
Pin
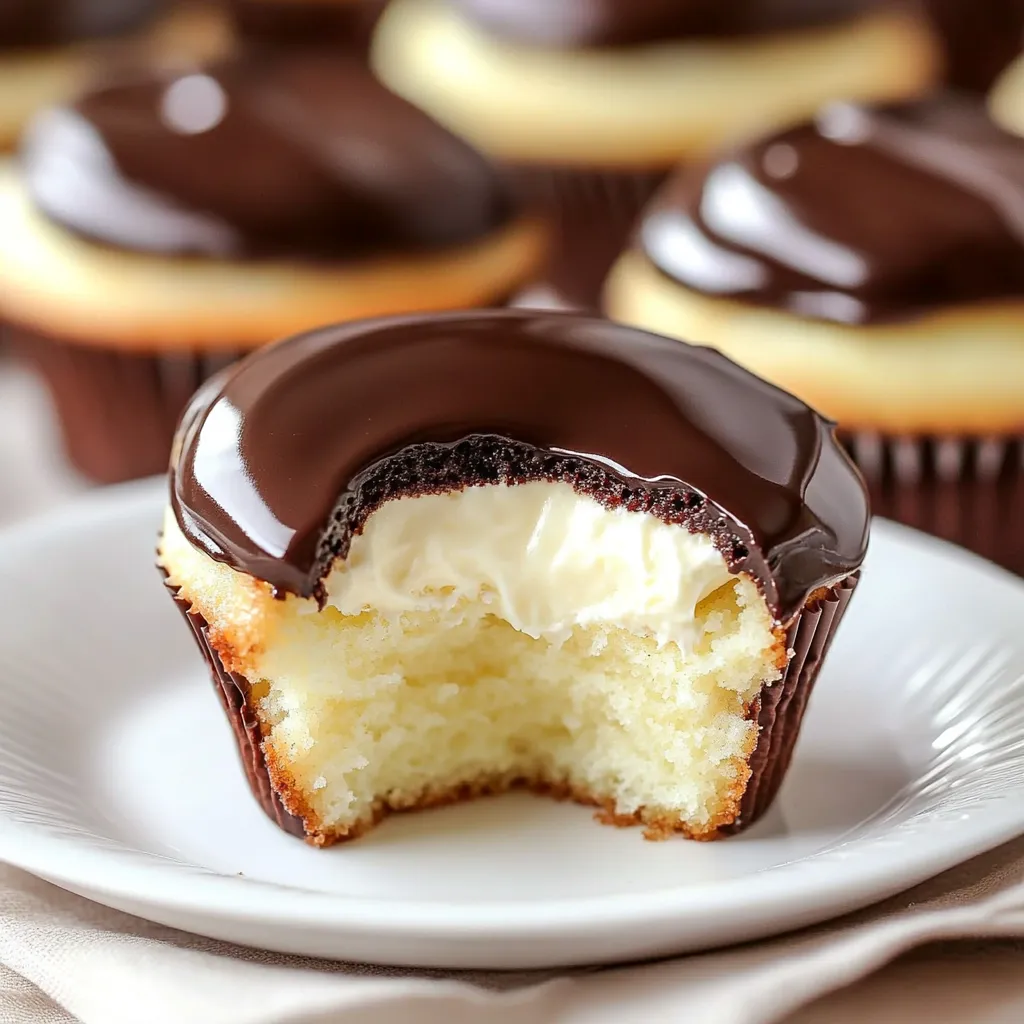
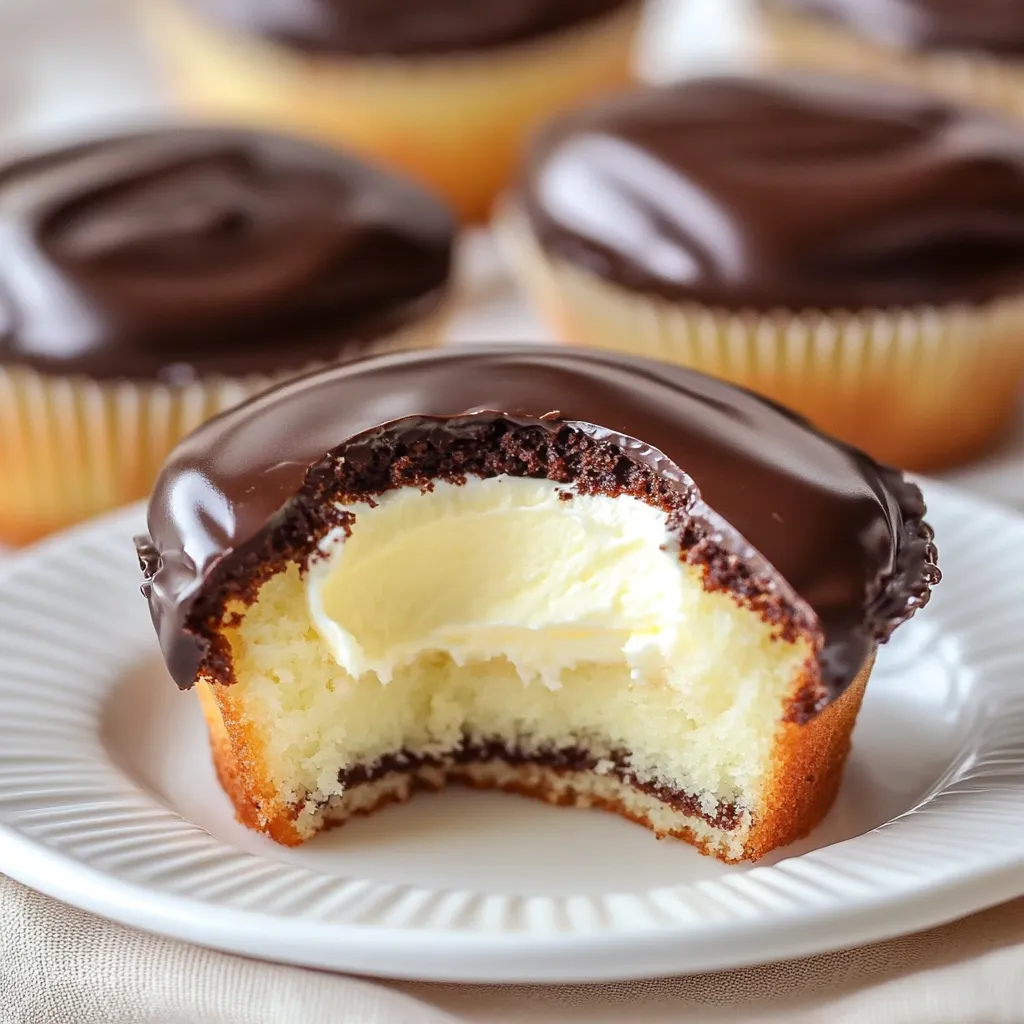
Turn this classic treat into cute little cakes that are a blast to eat. Each one has three layers that'll have you coming back for more—a fluffy vanilla base, a sweet and smooth custard surprise, and a dreamy chocolate top that shines. They look fancy but still feel comforting, and everyone who tries one will want another. These little delights are real crowd-pleasers for any get-together.
I whipped these up for my husband's birthday after he got all nostalgic about the classic. His face totally lit up when he found the hidden custard. Now, folks always ask me to bring them to parties. Even my usually tough-to-please mother-in-law wanted the how-to—pretty sure that's the ultimate thumbs up that these are a hit!
Essential Ingredients
- All-purpose flour (1½ cups): Keeps your cupcakes soft without falling apart
- Baking powder (1½ teaspoons): Gives them a nice lift so they're not dense
- Salt (¼ teaspoon): Makes all the tastes pop and tones down the sugar
- Unsalted butter (½ cup, softened): Adds that rich, melt-in-your-mouth factor
- Granulated sugar (1 cup): Brings sweetness and helps everything stay tender
- Large eggs (3): Stick the mix together while making it a little richer
- Vanilla extract (2 teaspoons): Gives the cake a cozy smell and flavor
- Whole milk (½ cup): Makes everything nice and moist
- Egg yolks (4, for pastry cream): Give the filling that thick, dreamy feel
- Cornstarch (3 tablespoons): Helps the custard set up just right
- Heavy cream (½ cup): Makes the chocolate topping extra creamy
- Semisweet chocolate (6 ounces): Brings a rich, not-too-sweet chocolate taste
Cupcake Adventure
- Assembly Magic:
- After it all cools off, grab a knife or cupcake tool to carve out a middle chunk from each cake—about two-thirds deep, and keep those tops. Spoon or pipe that chilled pastry cream in till it’s a tiny bit mounded up. Dunk the tops of your filled cupcakes into the chocolate ganache, let it drip off a sec, then stand them upright. That top layer will set up all shiny and smooth, making every bite perfect.
- Ganache Creation:
- Chop your chocolate into bits and pop ’em in a heat-safe bowl. Warm the cream just until it steams, then pour it right over the chocolate. Don’t touch it yet—let it sit for two minutes, so it melts. Now gently whisk it all together until it’s glossy and smooth. You want it thick enough to coat but still loose enough to spoon or dip.
- Cream Perfection:
- Pour the custard through a fine sieve into a bowl to catch any egg bits and keep things silky. Press plastic wrap right onto the surface—no skin, thanks! Chill in the fridge for at least two hours, until thick enough to scoop or pipe, and bursting with rich flavor.
- Custard Crafting:
- While the cakes are in the oven, whip up your creamy filling. Beat together the yolks, sugar, and cornstarch till it’s pale and super thick. Gently warm the milk till it steams, then slowly whisk some into the yolk mixture. This way, you won’t scramble the eggs. Pour everything back into the pot and cook, whisking all the time. When it’s thick as pudding and sticks to the spoon, pull it off the heat and stir in butter plus vanilla.
- Perfect Baking:
- Warm your oven to 350°F. Bake your cakes for 18-22 minutes—when you poke the tops, they should bounce back, and a toothpick in the middle comes out dry. Golden tops mean it’s ready. Let them chill in the tray about five minutes, then pop them onto a rack to cool all the way. Trying to fill warm cakes is a rookie mistake—wait till they’re cool, or you’ll wreck your cream.
- Batter Completion:
- Mix in the flour and milk, swapping between the two, starting and ending with the dry stuff. This keeps everything from getting tough. You want a thick, scoopable batter. Fill your muffin liners about two-thirds full—just enough space to let them rise right. That way, your cakes turn out nice and even.
- Base Preparation:
- Stir up the flour, baking powder, and salt in one bowl and set aside. In a different, bigger bowl, whip the butter and sugar together until it’s fluffy and pale. This gets air in there for a light cupcake. Crack in the eggs one at a time, mixing in each before the next. Add vanilla. Doing it this way keeps the batter from getting weirdly chunky.
 Pin
Pin
My grandma taught me the ins and outs of baking, and she always said the trick with multi-layer desserts like this is taking your sweet time. 'Every bit should taste great by itself,' she’d tell me, 'because that’s the secret behind something amazing.' I still think of her reminding me not to rush the custard or beat the flour in too hard. It’s kinda like baking connects me back to family and brings some extra magic into my kitchen.
Stylish Serving
Pile these beauties on a tiered tray to steal the show at parties. Going for individual flair? Pop each cupcake onto a little plate, add a strawberry half and some mint for color. Sprinkle a dusting of cocoa powder on your tray before lining up the cakes—makes ’em look downright fancy. Want to gift them? Snuggle single cupcakes into little clear boxes tied up with ribbon so everyone can see those cool layers inside.
Fun Twists
Switch things up by mixing espresso powder into the chocolate for a mocha flavor that’ll please coffee fans. Or, zest up the batter with orange and add a splash of orange liqueur to the custard for a citrusy hit. Feeling fall vibes? Stir pumpkin spice into the cake and a bit of maple syrup into your filling. Go all-in for chocoholics by swapping in chocolate cake for the base and keep that creamy middle—double trouble in the best way.
Smart Storage
Pop these in a covered box in the fridge for up to three days—your pastry cream needs it, and the cool air keeps the chocolate nice. Let them warm up about 20 minutes before eating for maximum yum. If you wanna plan ahead, bake the cakes first and store them at room temp for two days, stash the filling in the fridge up to three days, and gently rewarm the chocolate when you’re ready to put it all together.
I’ve tried a ton of baked goods over the years, but these Boston cream cakes are still what I’m most proud of. The best feeling is seeing someone’s face light up when they hit that creamy middle. Sure, they’re more work than your standard cupcakes, but the mix of soft cake, smooth filling, and rich chocolate makes it so worth it. That’s why I love baking—turning simple stuff into something that makes folks genuinely happy. For me, these are memories you can eat, not just a sweet treat.
 Pin
Pin
Recipe Questions & Answers
- → Is it okay to make these cupcakes a day or two early?
- Sure thing! Fix them up to 48 hours before you need them. Just pop them in a sealed container in the fridge.
- → What's the best way to keep extra cupcakes?
- They’ll be fine in the fridge for about three days. Make sure they stay chilled, since that filling needs the cold.
- → Is it alright to pop these cupcakes in the freezer?
- Wouldn’t do it! Freezing messes up the custard and you won’t like the way it thaws.
- → My chocolate topping turned out super runny. Any tips?
- Give it more time to cool off on the counter. Still not thick? Set it in the fridge a few minutes, and don’t forget to stir every so often.
- → Can I swap milk chocolate for semisweet in the ganache?
- Go for it! Using milk chocolate will make it even sweeter and so creamy.