
 Pin
Pin
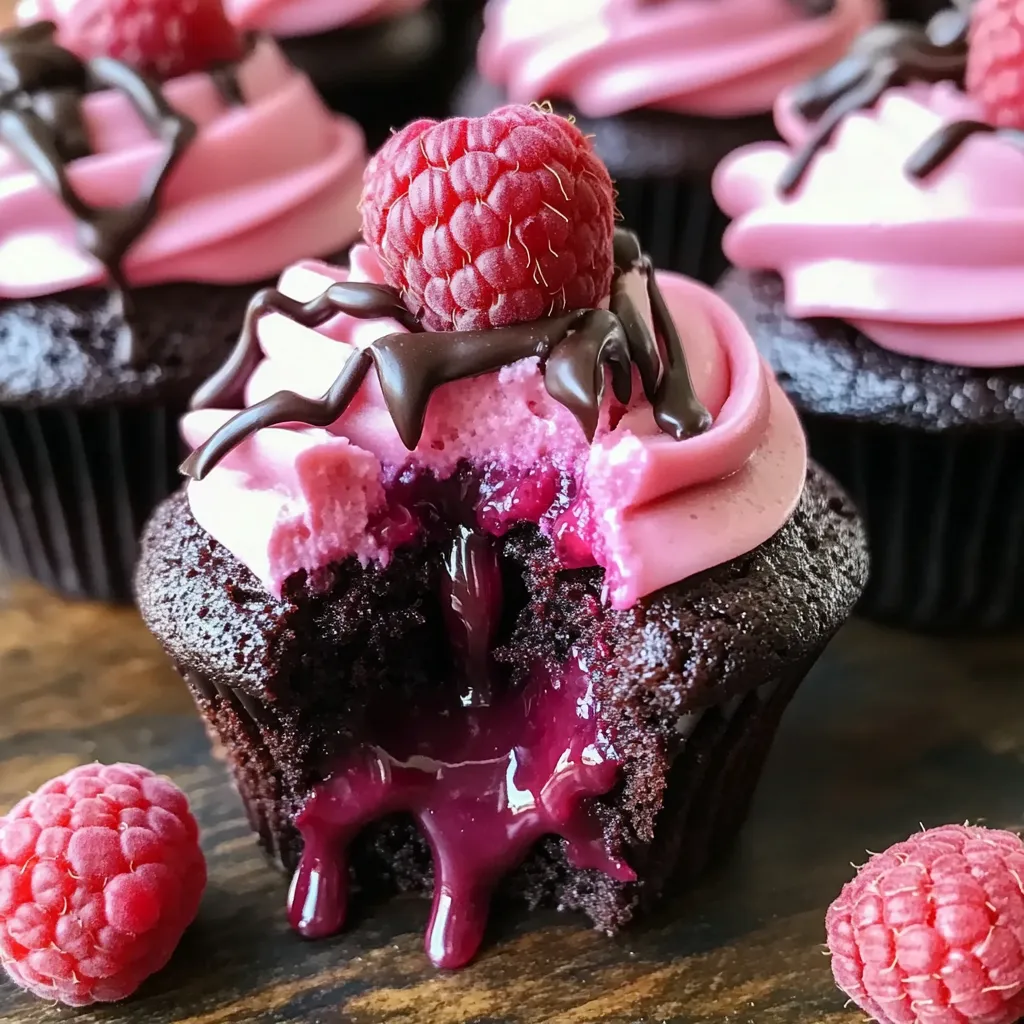
Chocolate raspberry lava cupcakes mix fudgy cake with an oozing center swirled with tangy raspberry. They hit that sweet spot between fancy flavor and comfort food goodness. You'll fall for these luxurious treats that work for special events or anytime you want something fancy that's actually easy to make.
The first time I brought these cupcakes to a party, they vanished in seconds. Everyone noticed those pretty red and white swirls, but it was how the textures played together that had people grabbing seconds. My kids now beg for these on their birthdays instead of regular cake - there's no better stamp of approval than that from my pickiest eaters.
Key Ingredients
- Unsalted butter: Makes everything tender and rich while letting you control the saltiness; grab European butter with more fat if you want extra luxury
- Semisweet chocolate: The star of the show flavor-wise; pick good quality bars around 60-70% cacao instead of chips since they'll melt better
- Granulated sugar: Tames the sour raspberries and bitter chocolate; try using superfine sugar if you've got it for smoother mixing
- Large eggs: Give structure and richness; let them sit out before using so they blend better and make fluffier cakes
- Vanilla extract: Makes chocolate taste even more chocolatey; real extract works way better than the fake stuff
- All-purpose flour: Provides just enough structure without making things too cakey; spoon it into your measuring cup then level off for best results
- Salt: The secret weapon that makes both chocolate and raspberry pop; fine sea salt works great here
- Raspberry preserves: Brings concentrated berry flavor in the right texture; look for jars with real fruit chunks and not too much added sugar
- Heavy cream: Creates that silky center texture; get cream with at least 36% fat for the best outcome
Baking Steps
- Getting ready:
- Set your oven to 375°F with the rack in the middle. Put paper liners in a 12-cup muffin tin, preferably dark-colored ones that'll catch any spills.
- Making the chocolate base:
- Put butter and 4 ounces of chopped semisweet chocolate in a bowl that's safe for the microwave. Heat it in 30-second bursts, stirring well between each until it's completely smooth. Make sure it's warm but not hot enough to cook eggs when added.
- Adding sugar:
- Whisk the sugar into your chocolate mixture until it's not grainy anymore and looks a bit shiny. You'll need to whisk hard for about 90 seconds.
- Working with eggs:
- Add eggs one at a time, whisking really well after each one until completely mixed in. You'll notice the batter getting thicker and silkier with each egg. Stir in the vanilla until just mixed.
- Adding flour:
- Sift flour and salt right over your chocolate mixture, then use a rubber spatula to fold everything together in a figure-eight motion. Stop as soon as you don't see dry flour anymore—too much mixing makes tough cupcakes.
- Filling the cups:
- Divide your chocolate batter evenly among the muffin cups, filling each about two-thirds full. Use a spoon to make a little dent in the center of each to hold the filling better.
- Making the filling:
- Warm raspberry preserves in a small pot over low heat until just melted, stirring now and then so it doesn't burn. Take it off the heat and add the remaining chopped chocolate. Let it sit for 30 seconds, then gently stir until smooth. Slowly whisk in the heavy cream until it looks glossy and flows nicely.
- Adding the filling:
- Carefully spoon the raspberry-chocolate filling into the middle of each cupcake, about 1-2 teaspoons per cupcake. The filling should sink slightly but still be visible on top.
- Baking them:
- Put the muffin tin in the hot oven and bake for exactly 12-14 minutes. Look for set edges with slightly puffy, not-quite-done centers when you take them out, as they'll keep cooking from the leftover heat.
- Cooling time:
- Let the cupcakes rest in the tin for exactly 5 minutes before carefully moving them to a wire rack. This short cooling time lets them firm up enough to handle while keeping their gooey centers flowing.
 Pin
Pin
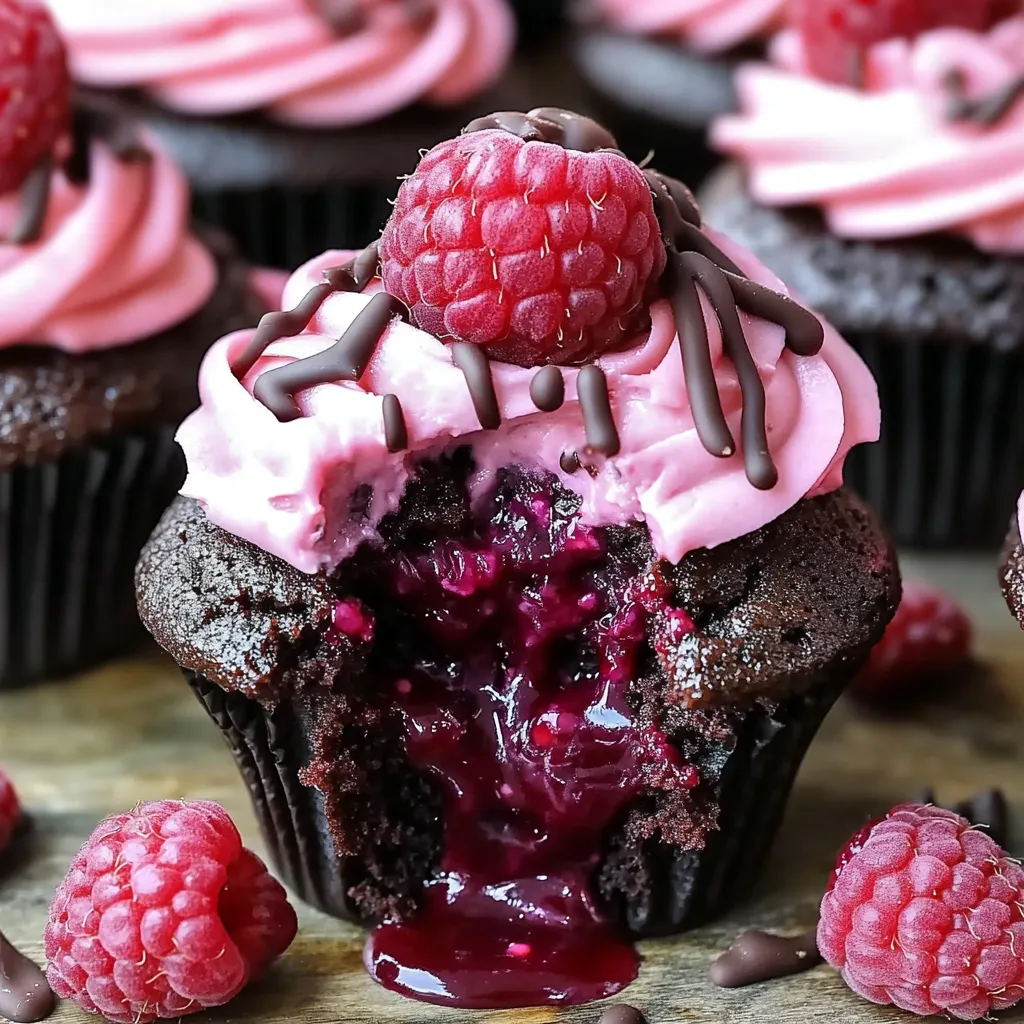
My grandma always taught me to be patient with layered desserts. I can still see her gently tapping my hand when I tried sneaking a piece of her famous cakes before they'd cooled enough. 'Wait a bit and you'll be glad you did,' she'd say with a knowing look. That wisdom definitely applies to these lava cupcakes—giving them the right cooling time changes them from a hot mess to perfectly sliceable treats with clear, distinct layers.
Great Companion Choices
These lava cupcakes go amazingly well with lots of different sides to make your dessert even better. Try warm squares topped with vanilla bean ice cream for that awesome hot-cold combo. Coffee lovers will enjoy having these with a cappuccino mixed with thick Greek yogurt, some shredded cinnamon, and a bit of honey drizzled on top. For fancy occasions, make a cool dessert platter with squares next to fresh raspberries, strawberries dipped in chocolate, and some whipped cream—the colors look beautiful next to the rich chocolate and tart raspberry layers.
Fun Twists
Switch things up with this flexible recipe to match your taste buds or whatever's in your pantry. Go tropical by swapping in mango preserves instead of raspberry and throwing in some lime zest to brighten up the filling. Want something with a kick? Mix in a tiny bit of cayenne pepper and some chili powder with your other seasonings. My sister makes an awesome fall version by adding pumpkin spice to the batter and swirling in some pumpkin butter into the filling. For extra crunch and flavor, sprinkle about 1/2 cup of toasted chopped walnuts or pecans between the cake and filling layers.
Keeping Them Fresh
Keep your lava cupcakes tasting amazing with these storage tricks. Put completely cooled cupcakes in an airtight container at room temperature for up to two days, with parchment paper between layers so they don't stick together. For longer storage, keep them in the fridge for up to a week, but remember that cold will firm up the gooey center. When you want to eat refrigerated cupcakes, let them sit out for 20 minutes, then warm them in a 300°F oven for 3-5 minutes to get that flowing center back. Or just zap individual cupcakes in the microwave for 10-15 seconds at half power for a quick fix.
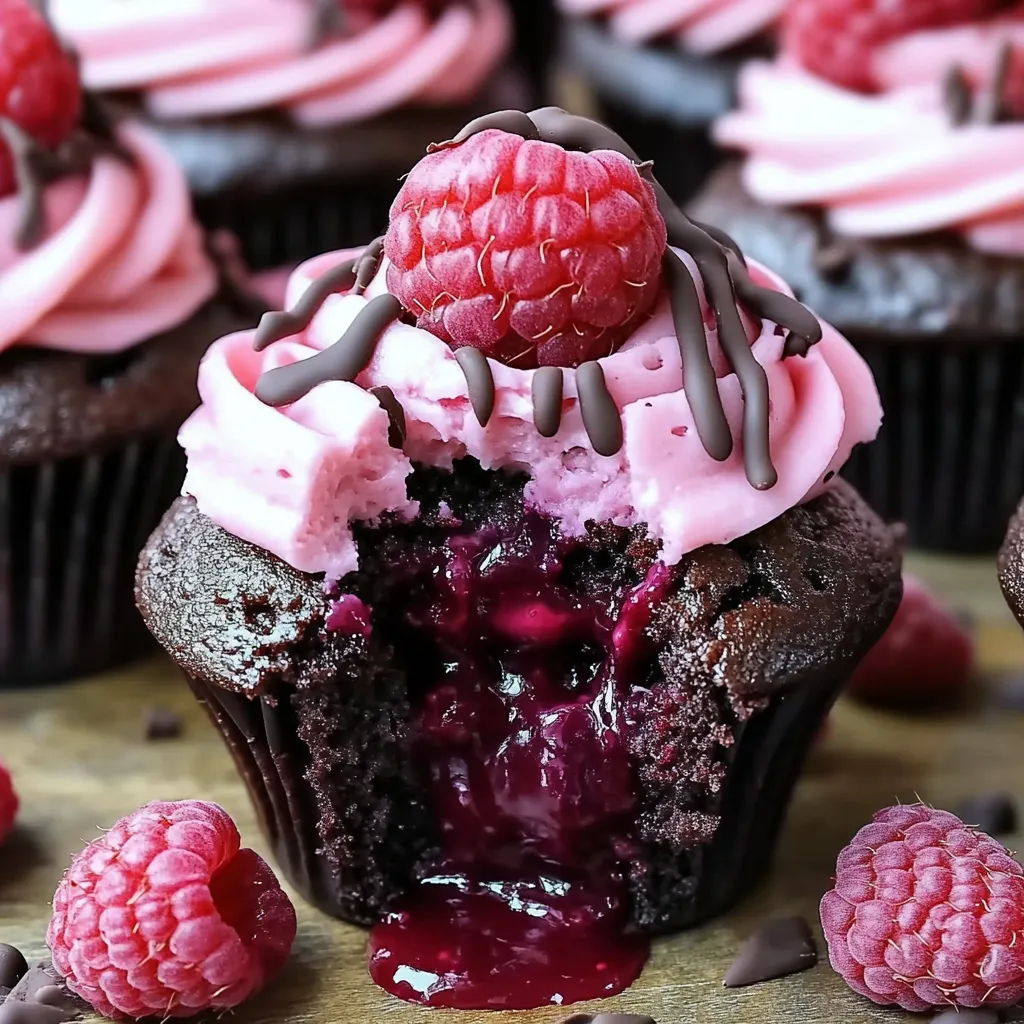
These raspberry chocolate lava cupcakes have become what I'm known for at every potluck, with friends and family constantly asking me to bring them to gatherings. What I love most is how something so simple can instantly put you in a better mood. The mix of rich chocolate, smooth cheesecake, and bright raspberry creates something that's better than all those flavors on their own. Even my friends who usually pass on dessert can't resist these once they've tried them.
 Pin
Pin
Recipe Questions & Answers
- → Can I make these cups ahead of time?
- Sure! Mix up the batter and chill it in the fridge for up to a day. Bring it back to room temperature before baking for melty centers.
- → Is there a good substitute for raspberry preserves?
- Try swapping with blackberry or strawberry preserves. Cherry or apricot can also bring fun new flavors to the chocolate.
- → How can I tell when these are baked perfectly?
- The tops should be set, and the edges firm, but the middle should still jiggle lightly. Use a toothpick near the edge—it should come out mostly clean, but gooey inside.
- → Can these be frozen?
- Yes, though they’ll lose the molten quality a bit. Freeze without icing, and warm them in the microwave for a gooey texture boost.
- → Which type of chocolate gives the best results?
- Go for semisweet chocolate for a balanced taste. Dark works for bold lovers, and milk is perfect for sweeter cravings. Just pick a good melting kind!