
 Pin
Pin
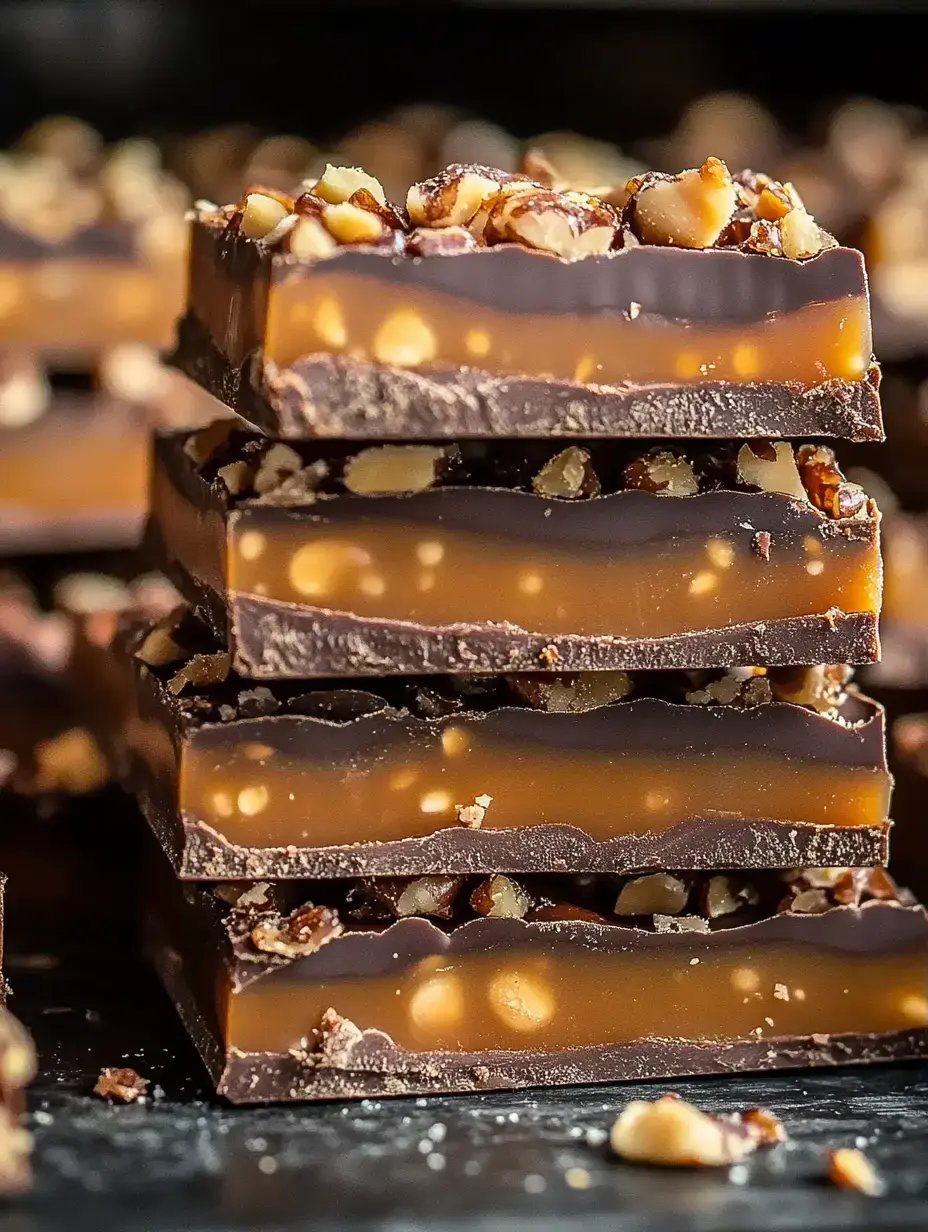
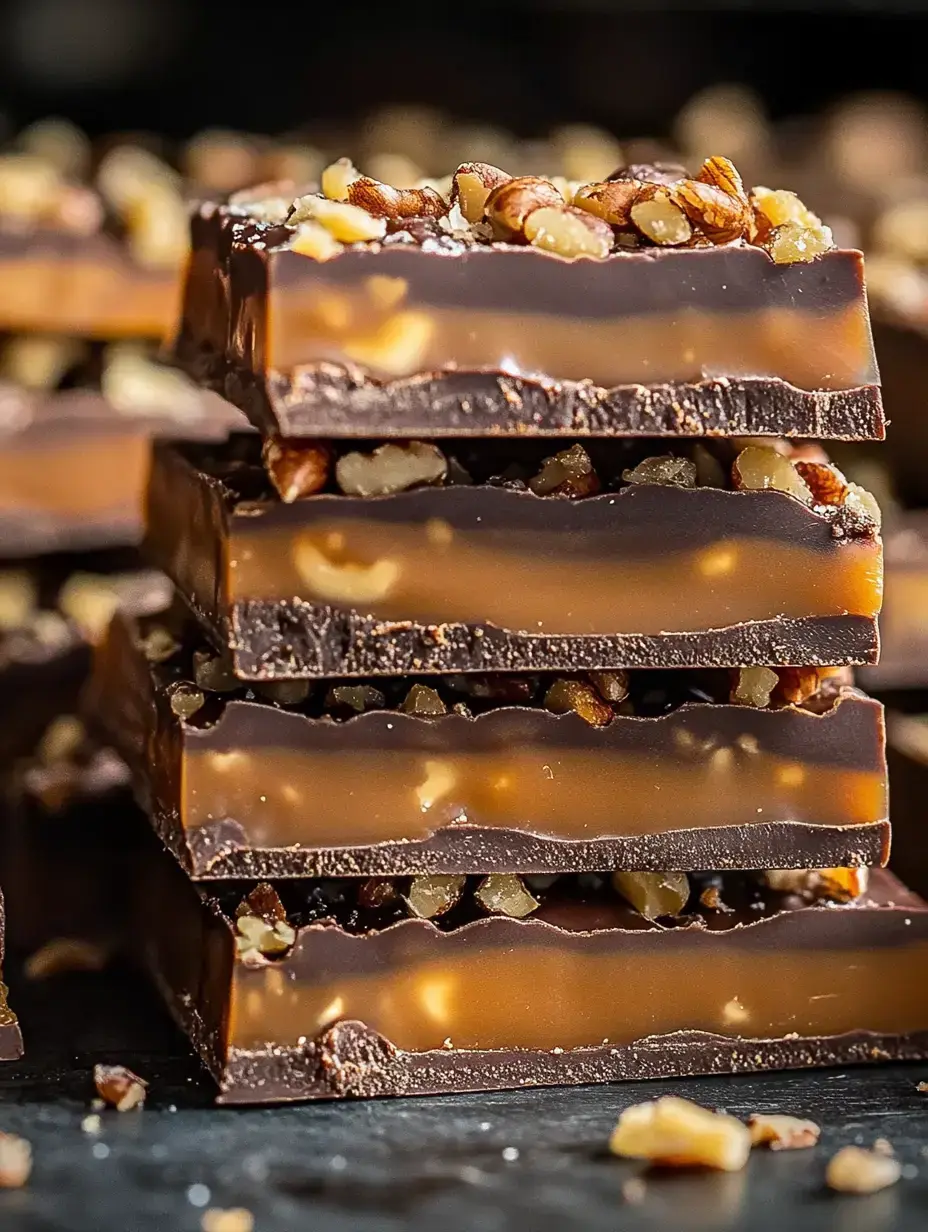
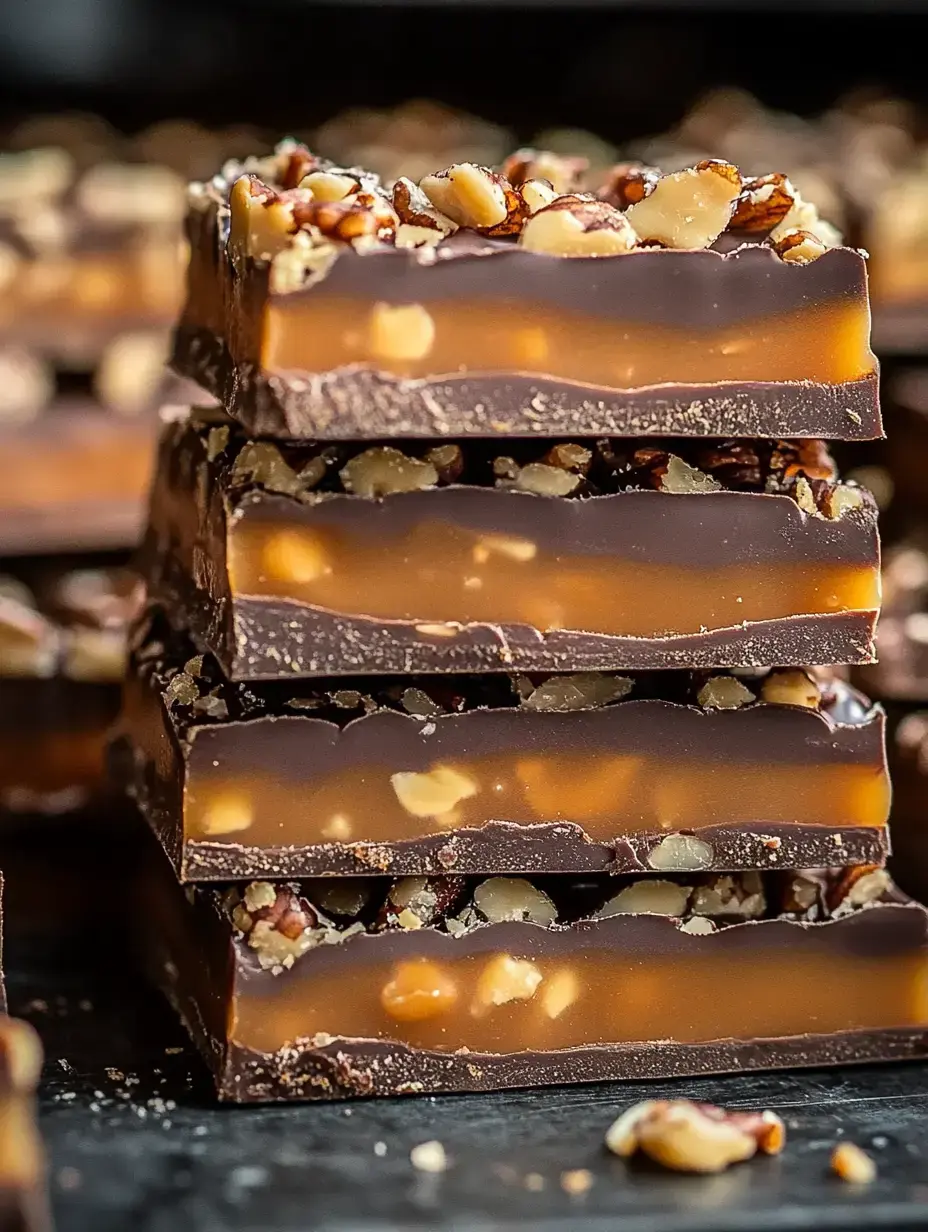
The sweetest smell fills my home whenever I whip up these Butterfinger Caramel Crunch Bars. After so many family events and potlucks, I've noticed they're always the treat folks remember most. The melt-in-your-mouth buttery bottom paired with that chewy caramel hits the spot every time. I can't help but smile seeing everyone's reaction when they first taste these amazing layered goodies.
Pure Delight in Each Bite
Ever since I brought these treats to my sister's spring baby shower, everyone keeps asking me for the instructions. There's something truly special about how the smooth caramel works with those crunchy Butterfinger pieces - it's just happiness in bar form. I keep things easy because who wants complicated steps when the outcome tastes this good? My teenager who swears he can't bake even got them right the first time he tried.
Must-Have Items
- Unsalted Butter: Melt down ½ cup until just liquid. Don't let it get too dark or brown.
- Graham Cracker Crumbs: You need 1 ½ cups smashed into tiny pieces. A zip bag works great if you don't want to use your food processor.
- Granulated Sugar: Just ¼ cup makes the base perfectly sweet.
- Heavy Cream: Two tablespoons create that wonderful smooth caramel.
- Caramel Bits: Look by the chocolate chips for one cup of these gems.
- Semi Sweet Chocolate Chips: Grab 1 ½ cups for your top layer.
- Butterfinger Bars: About 3-4 bars, all crushed up. Buy extra because snacking will happen!
- More Butterfingers: For the top because why not add more goodness?
Creating Your Masterpiece
- The Waiting Game
- Let everything cool completely before putting in the fridge. Patience gives you those perfect cuts later.
- Top it Off
- Get those chocolate chips melty with a bit of butter until smooth. Spread carefully for that shiny finish everyone loves.
- Butterfinger Time
- Scatter those candy pieces everywhere like you're throwing a party. Push them gently into the caramel.
- Create the Caramel Layer
- Melting caramel feels so relaxing. Mix your bits and cream in the microwave, stirring often until totally smooth. Pour over your warm base.
- Start with the Base
- Heat your oven to 350°F. Mix the graham crumbs, melted butter, and sugar until it looks like wet sand. Press firmly into your lined pan - I always use a measuring cup for this. Bake about eight minutes until it's slightly golden.
Building a Sturdy Base
Want to know my crust trick? Press it down really well. You need it packed tight so it won't fall apart when cutting. My grandma taught me to use parchment paper with extra hanging over the sides. That way you can lift everything out in one piece super easily.
 Pin
Pin
Tasty Caramel Tips
Don't rush your caramel - that's the golden rule. Those little caramel bits work way better than those wrapped candies. The cream keeps everything perfectly soft even after cooling. Nobody wants to deal with hard-as-rock caramel that fights back.
Breaking Up Candy Bars
My kids love to help smash the Butterfingers. We stick them in a plastic bag and take turns with the rolling pin. Just keep an eye on your helpers - you want some bigger chunks left to give you that awesome crunch factor.
Perfect Chocolate Topping
Your chocolate layer needs a light touch. I mix in a bit of butter while it melts for that really smooth look. When you spread it while it's warm, you'll get that fancy bakery finish that wows everyone.
Cooling Properly
Getting these bars to set right makes all the difference. I leave them out until they're totally room temperature then stick them in the fridge for a few hours. Cutting too soon just messes up all those beautiful layers.
Final Fancy Touch
I often can't stop myself from throwing more Butterfinger bits on top while the chocolate's still wet. It makes them look so tempting and adds that extra bit of crunch my family goes nuts for.
 Pin
Pin
Storage Smarts
Keep these bars in a closed container at room temp for around five days. Though honestly, they never stick around that long at my place. If your house is warm, pop them in the fridge.
Try New Flavors
Last month I swapped in Snickers instead of Butterfingers and my book club couldn't get enough. Twix works great too. The best part is making each batch your own special creation.
Party Favorites
These bars always steal attention whenever I bring them somewhere. They look so pretty on any dessert table and everyone asks how to make them. They're perfect when you want something impressive without spending all day cooking.
Gift Giving Ideas
During Christmas I cut these into neat squares, wrap them in pretty paper and add some ribbon. They make such thoughtful homemade gifts. My neighbors look forward to their little packages every year.
Joy in Every Layer
There's something truly special about making these stacked treats. The mix of textures and flavors makes everyone happy without fail. Whether you're cooking for your family, friends or just yourself, these bars always deliver. They've become part of so many good times in my kitchen and I bet they'll do the same for you.
 Pin
Pin
Recipe Questions & Answers
- → How can I keep these bars fresh?
Put them in a sealed container at room temperature for up to 5 days. If you need them to last longer, refrigerate; they'll stay good for about a week.
- → Can I make them in advance?
Absolutely! They need to chill for around 2 hours to firm up, and leaving them overnight in the fridge makes the flavors even better.
- → What's the easiest way to slice them?
Let the bars cool completely in the fridge. Use a sharp knife warmed in hot water, and clean it off after each cut for tidy slices.
- → Can I swap out the Butterfinger candy?
Sure! While Butterfingers are ideal for their unique flavor and crunch, you can try other candies as long as they pair well with caramel and chocolate.
- → Why is lining the pan so important?
The parchment paper stops the bars from sticking and makes it easy to lift the whole batch out. No mess, easy cutting.